Connect your entire tech stack
Integrations are how Serval acts on the rest of your stack. A connected application can power ticket sync with your ITSM, mirror knowledge bases into Serval, sync users/groups/devices for access management and assets, and give workflows (and Catalyst) the ability to take real actions - provision access, manage devices, file tickets, query records. To browse what’s available, open your team workspace and go to Integrations → Connect new. Search the catalog, or choose Connect an app to add a custom application.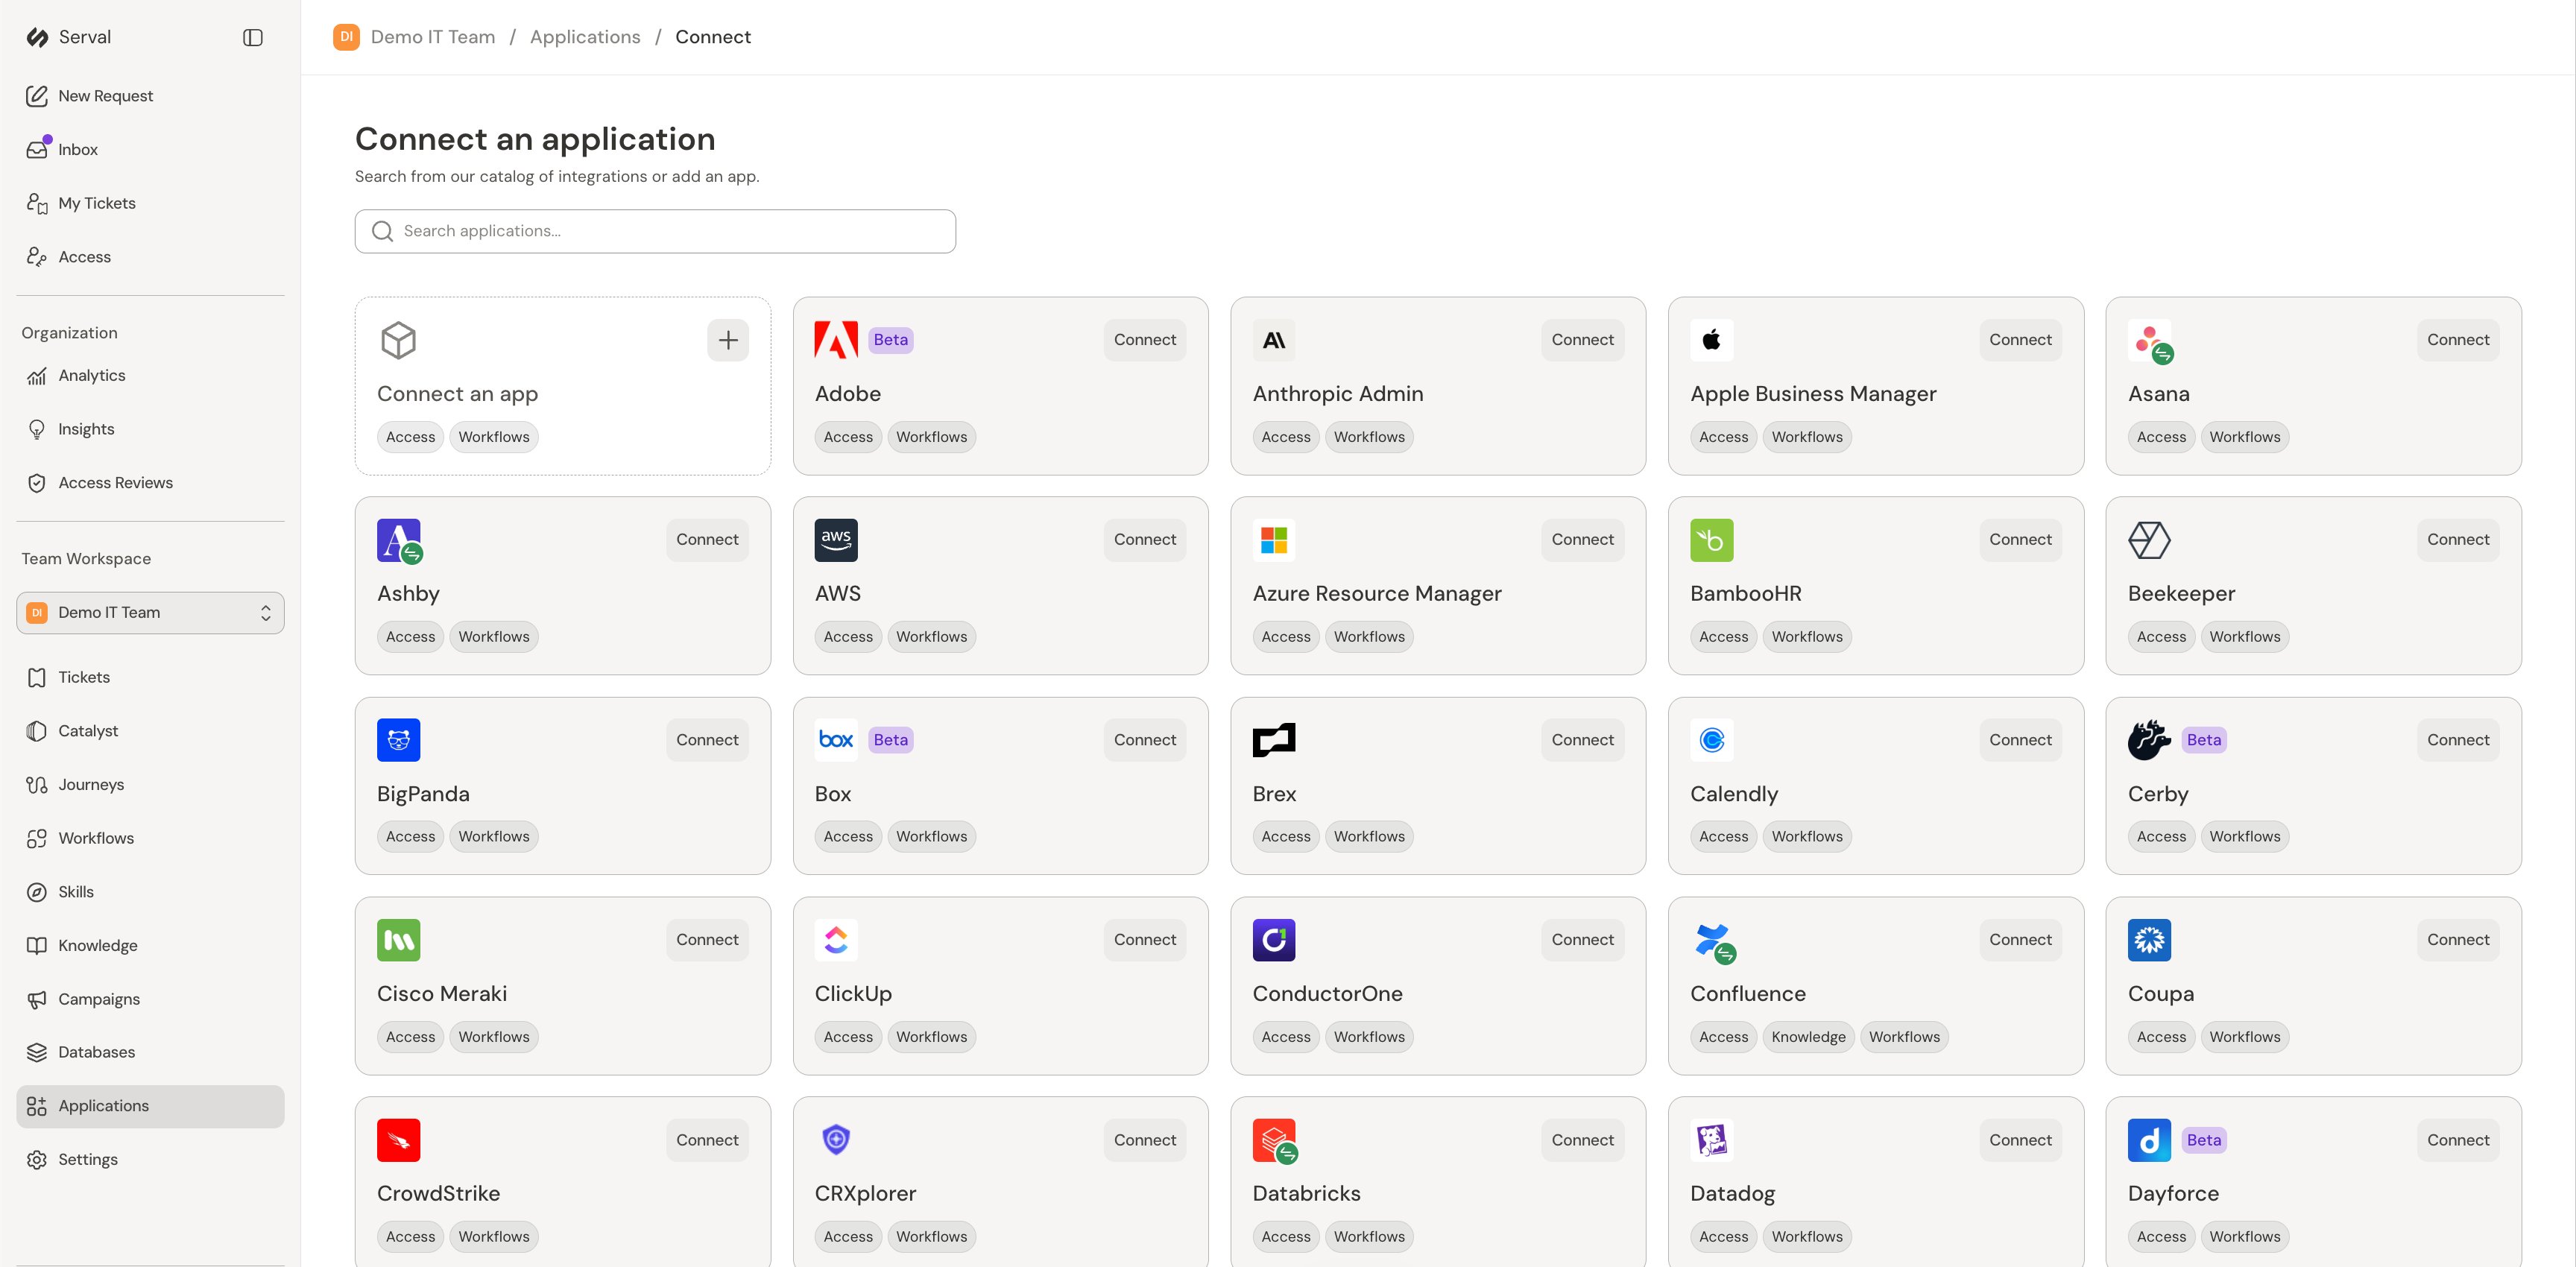
The integration catalog - Integrations → Connect new
How connecting works
Each integration uses the connection flow its provider supports. You’ll see one of three patterns:- Sign in with the provider (OAuth) - a browser sign-in and consent screen, with no credentials to copy. Examples: Confluence, Jira, Notion, Microsoft 365.
- Guided app installs - Serval walks you through installing an app on the provider side, like a Slack app from a generated manifest, the Serval GitHub App, or the Microsoft Teams bot package.
- Credential forms - you create a credential in the provider’s admin console and paste it into Serval: API tokens (Kandji, Freshservice, Zendesk), OAuth client credentials (Okta, Salesforce, ServiceNow), or service accounts (Google Workspace, which also offers a basic Sign in with Google flow).
Manage connected applications
The Integrations page lists everything your team has connected, the capabilities each connection powers - Access, API, Knowledge, Ticket Sync, Workflows - and its connection status. Serval can also discover apps in use from your connected sources, so you can bring unmanaged software under management from the same page.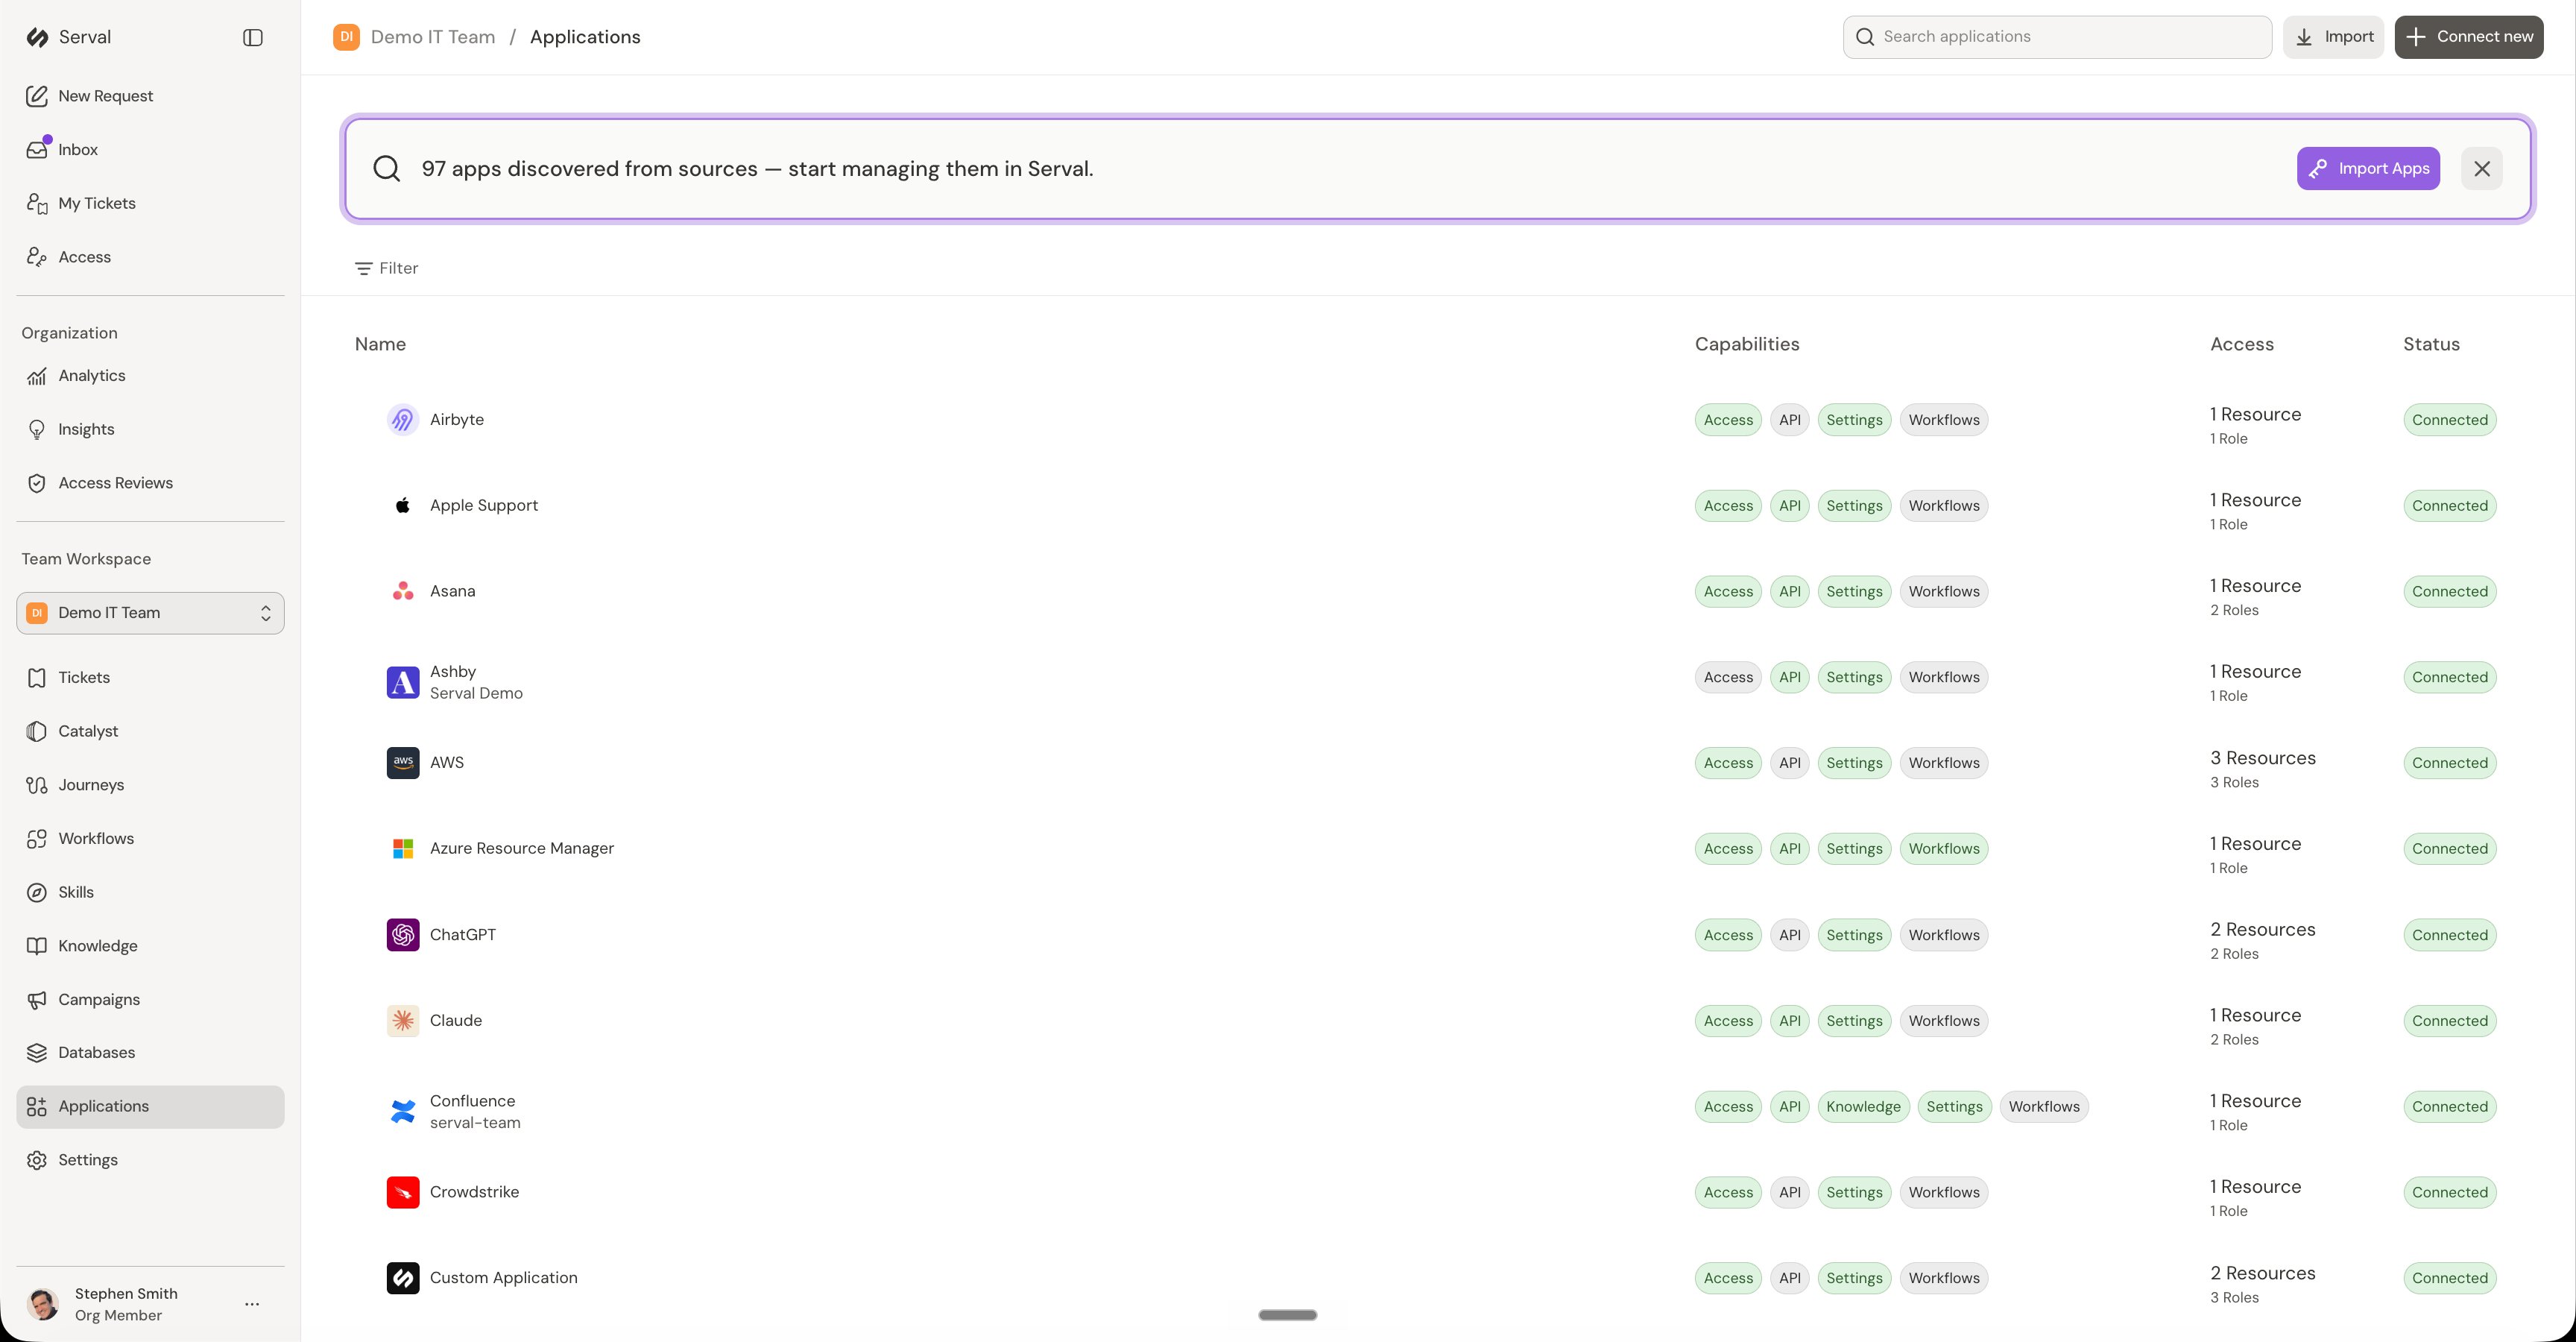
The Integrations page - capabilities, access, and status for every connected app
Verify with health checks
Most API-connected catalog integrations have an API Integration tab showing the scopes or permissions the connection was granted and a set of health checks that exercise the live integration - authentication, list/read access per surface, and write access where workflows need it. Run them right after connecting, and any time something stops working: a failing check names what it couldn’t reach, which usually points straight at a missing scope or permission on the provider side. A few integrations don’t include built-in health checks yet - their pages say so and suggest a quick manual verification instead.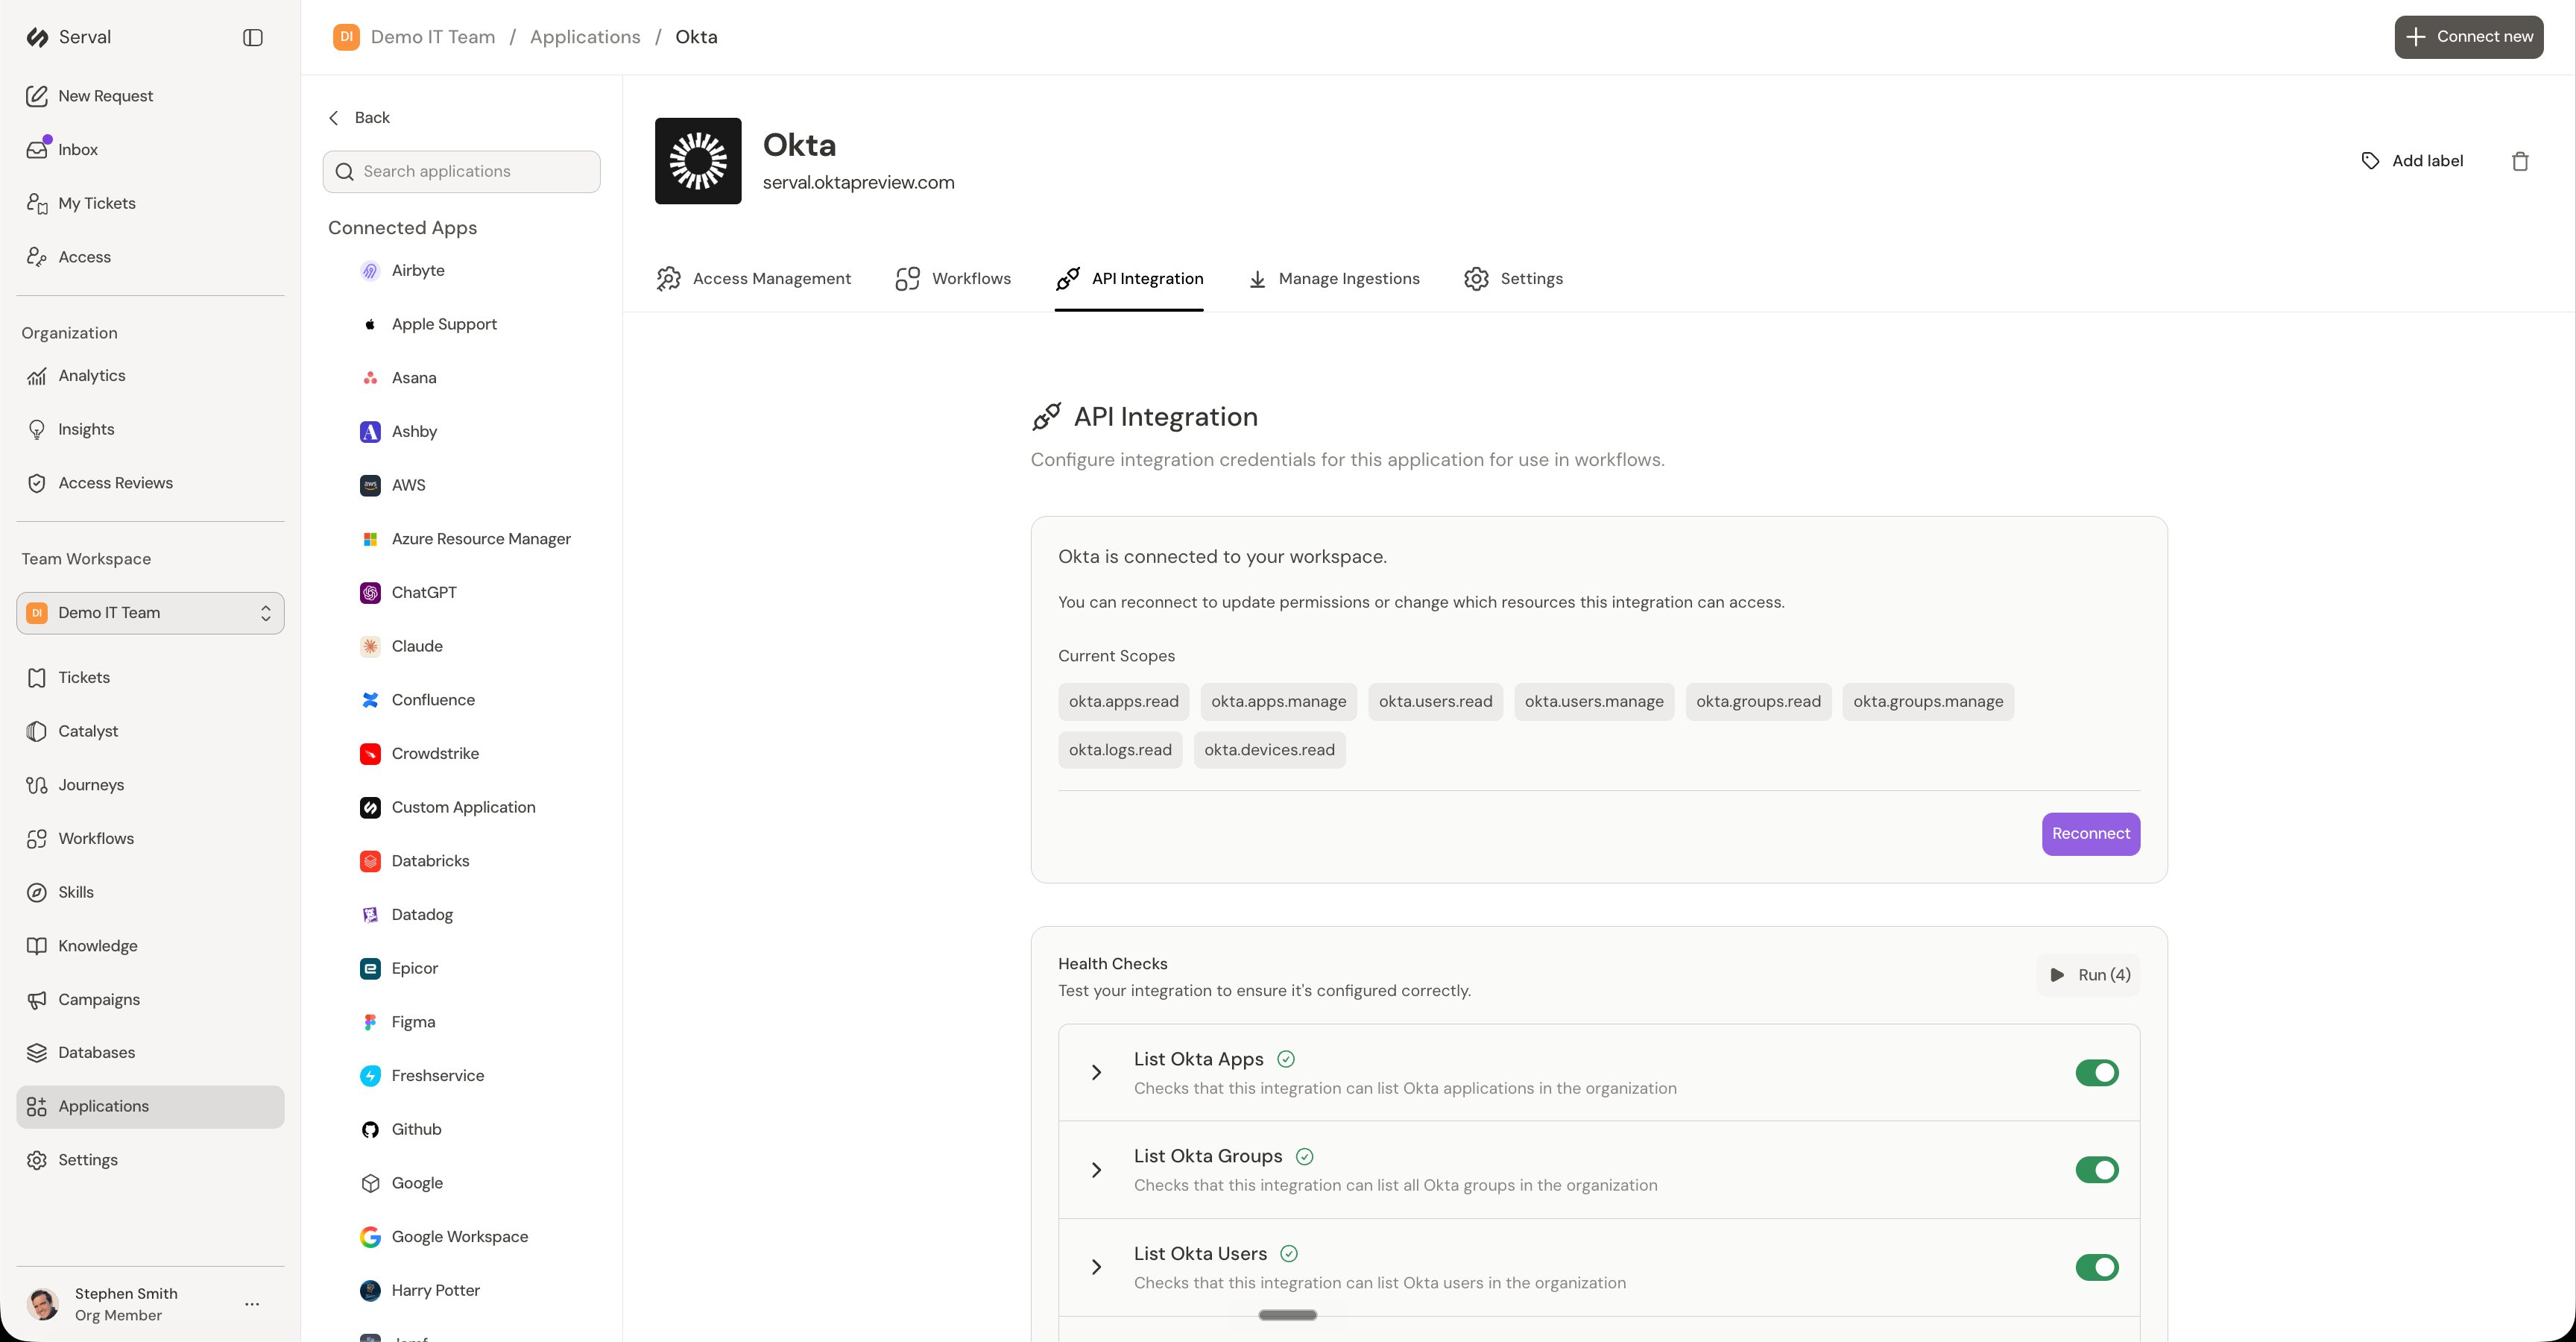
An application's API Integration tab - granted scopes and runnable health checks
Duplicate applications across teams
You can copy a connected application’s configuration to other teams in one click. Instead of configuring each team from scratch, open the application’s Settings tab, find the Duplicate Application section, click Duplicate, and choose the destination team.Integration sync history
Each application’s Settings tab includes a Sync History view for monitoring background syncs:- Track recent sync runs - when each sync ran and its outcome
- View breakdowns - how many items were added, updated, or removed
- Identify issues - spot failed syncs and review error details to troubleshoot connectivity or permission problems