About AWS
Amazon Web Services (AWS) is a public-cloud platform, offering on-demand compute, storage, database, and networking services. Connecting AWS to Serval lets you automate everyday cloud-ops and security workflows—from listing IAM roles to spinning down unused EC2 instances—directly from chat.What the AWS integration enables
| Capability | Description |
|---|---|
| Access Management | Create, update, and manage users and their permissions |
| Automation workflows | Manage resources, create roles, and automate lifecycle management |
AWS configuration (in the AWS console)
Follow these steps to create a cross-account role that Serval can assume. The role’s policies determine exactly which AWS APIs Serval can call.-
Open the modal in Serval
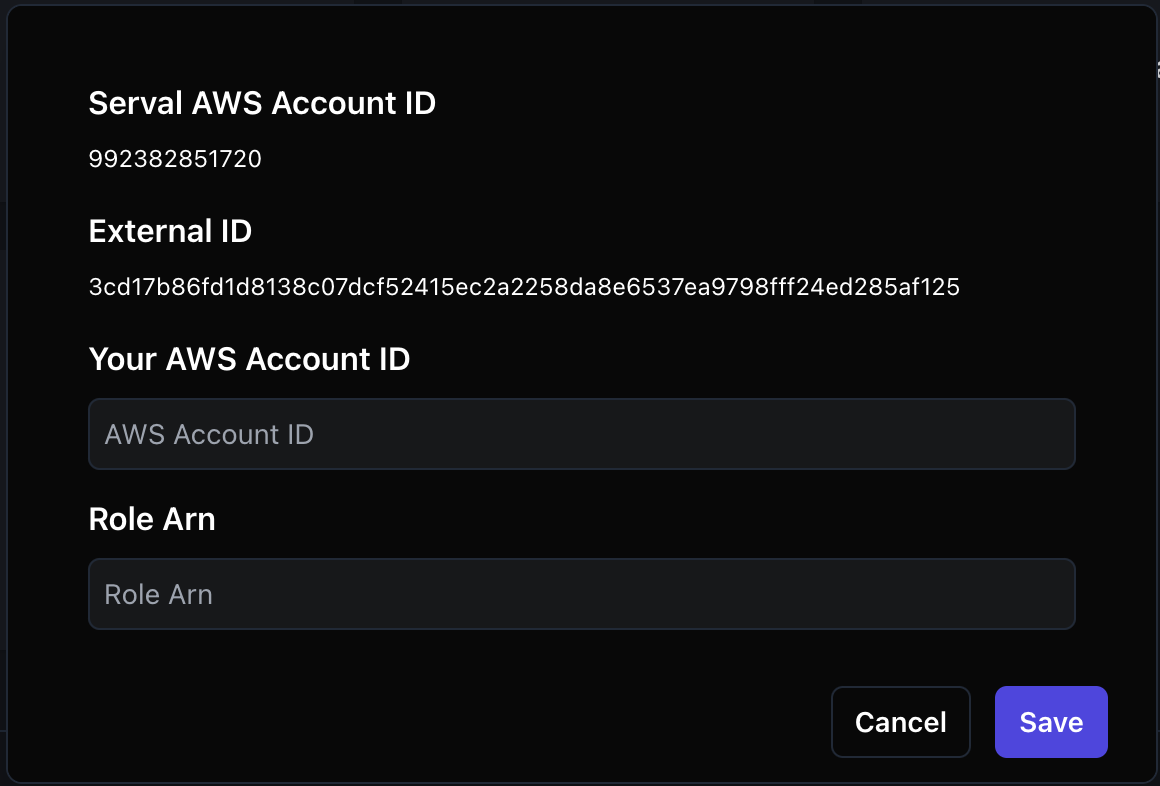
In the Serval UI navigate to Apps → Connect AWS. Leave this window open; it shows the Account ID and External ID you will need shortly.
-
Create a new IAM role
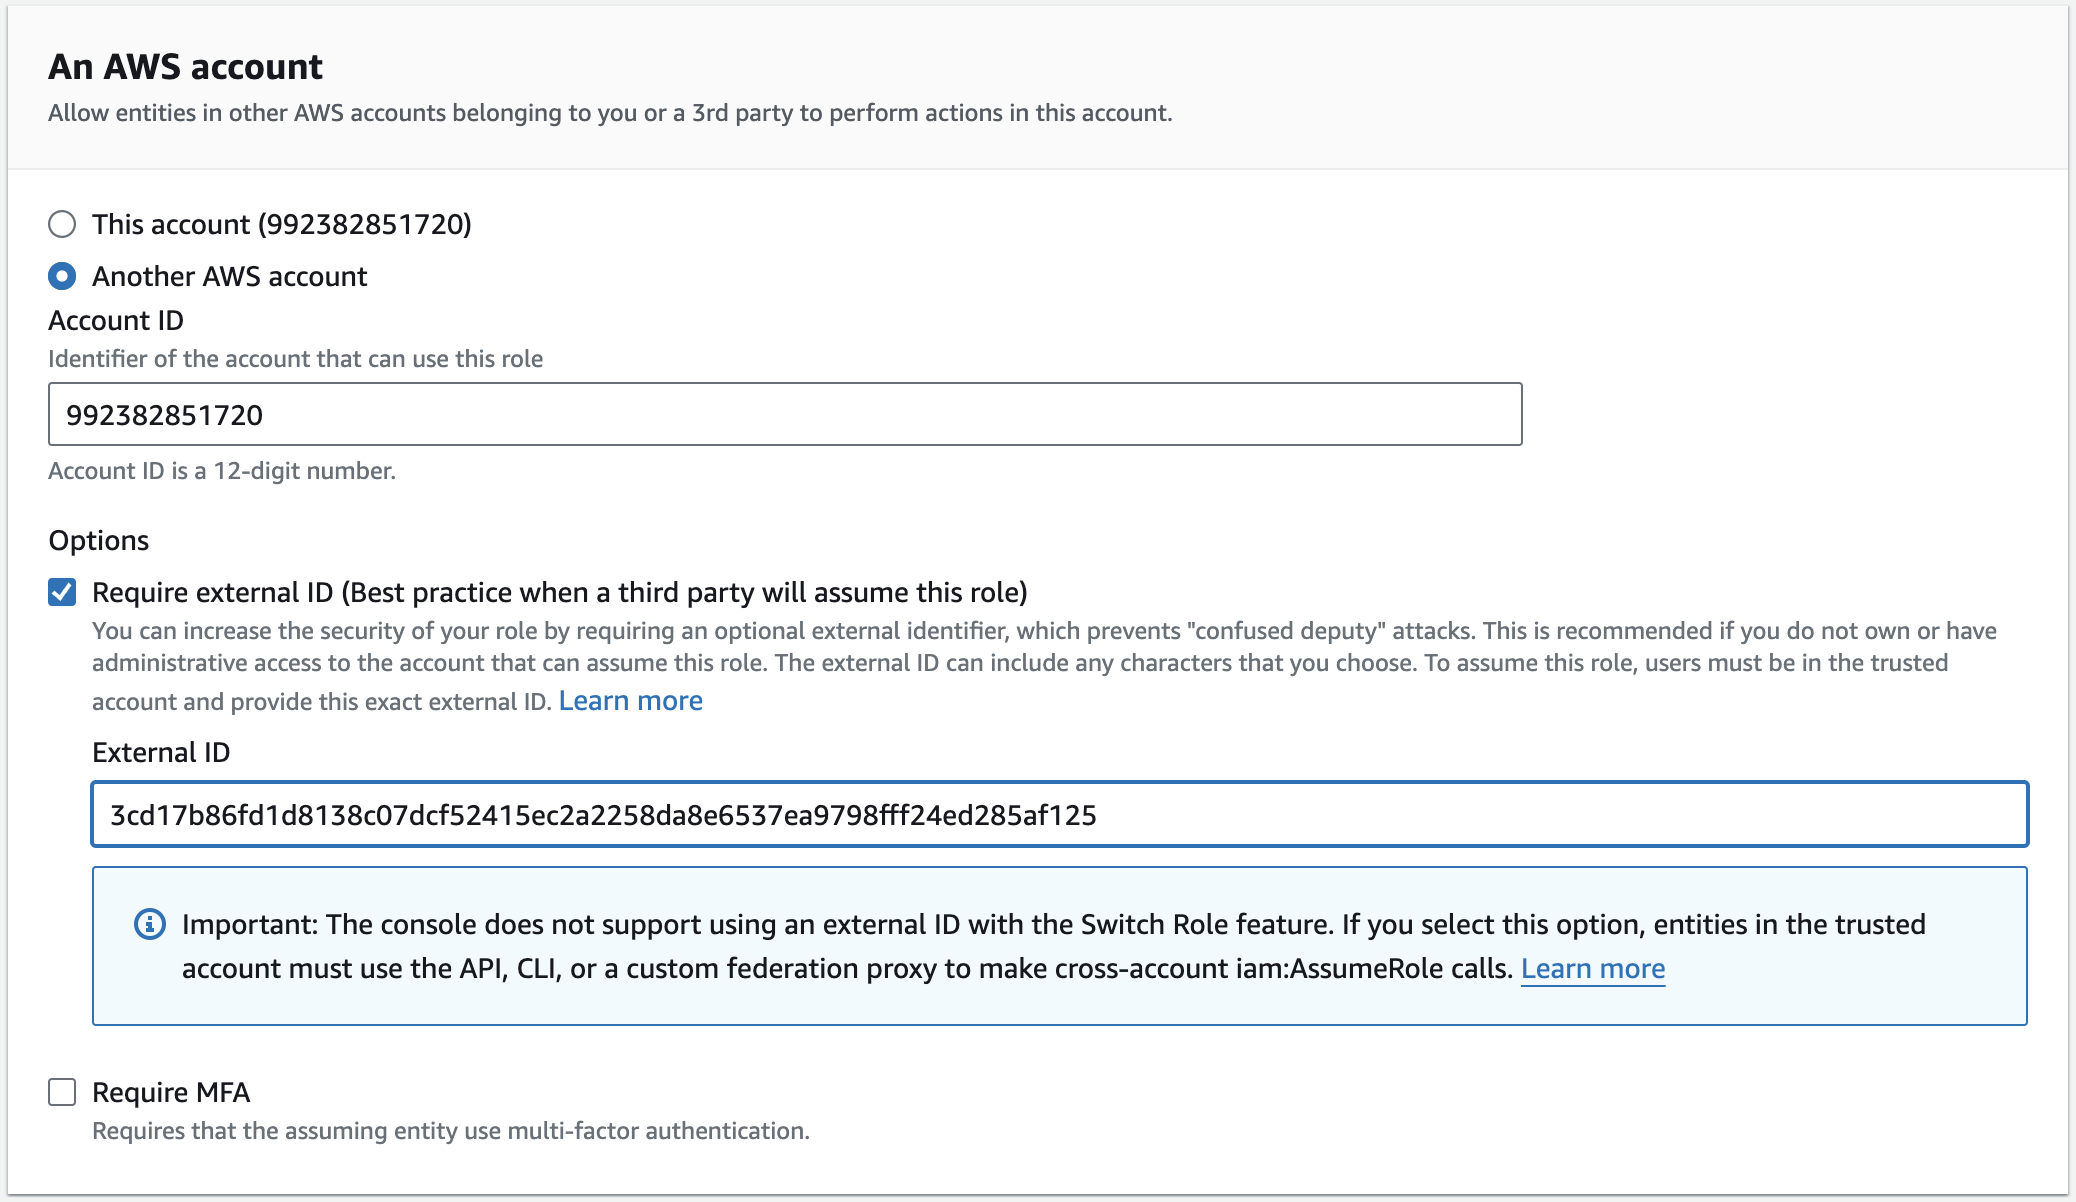
In AWS go to IAM → Roles → Create role and choose Another AWS account as the trusted entity.
Enter the Account ID shown in Serval, then tick Require external ID and paste the External ID..png?fit=max&auto=format&n=GwC92x9foS4UfJjd&q=85&s=546d3fb7c6fb444bcac9190cbb9a5529)

-
Attach policies
Select AWS-managed or custom policies that grant the actions Serval needs (e.g.IAMReadOnlyAccess).\.png?fit=max&auto=format&n=GwC92x9foS4UfJjd&q=85&s=24f8bfe259bc383b73a1ee6d6d2b4dc5)
-
Finish the role wizard — name the role something memorable and click Create role.\
.png?fit=max&auto=format&n=GwC92x9foS4UfJjd&q=85&s=2a881c964bb6e8b45715dbf5f3ba07f8)
-
Update the trust policy
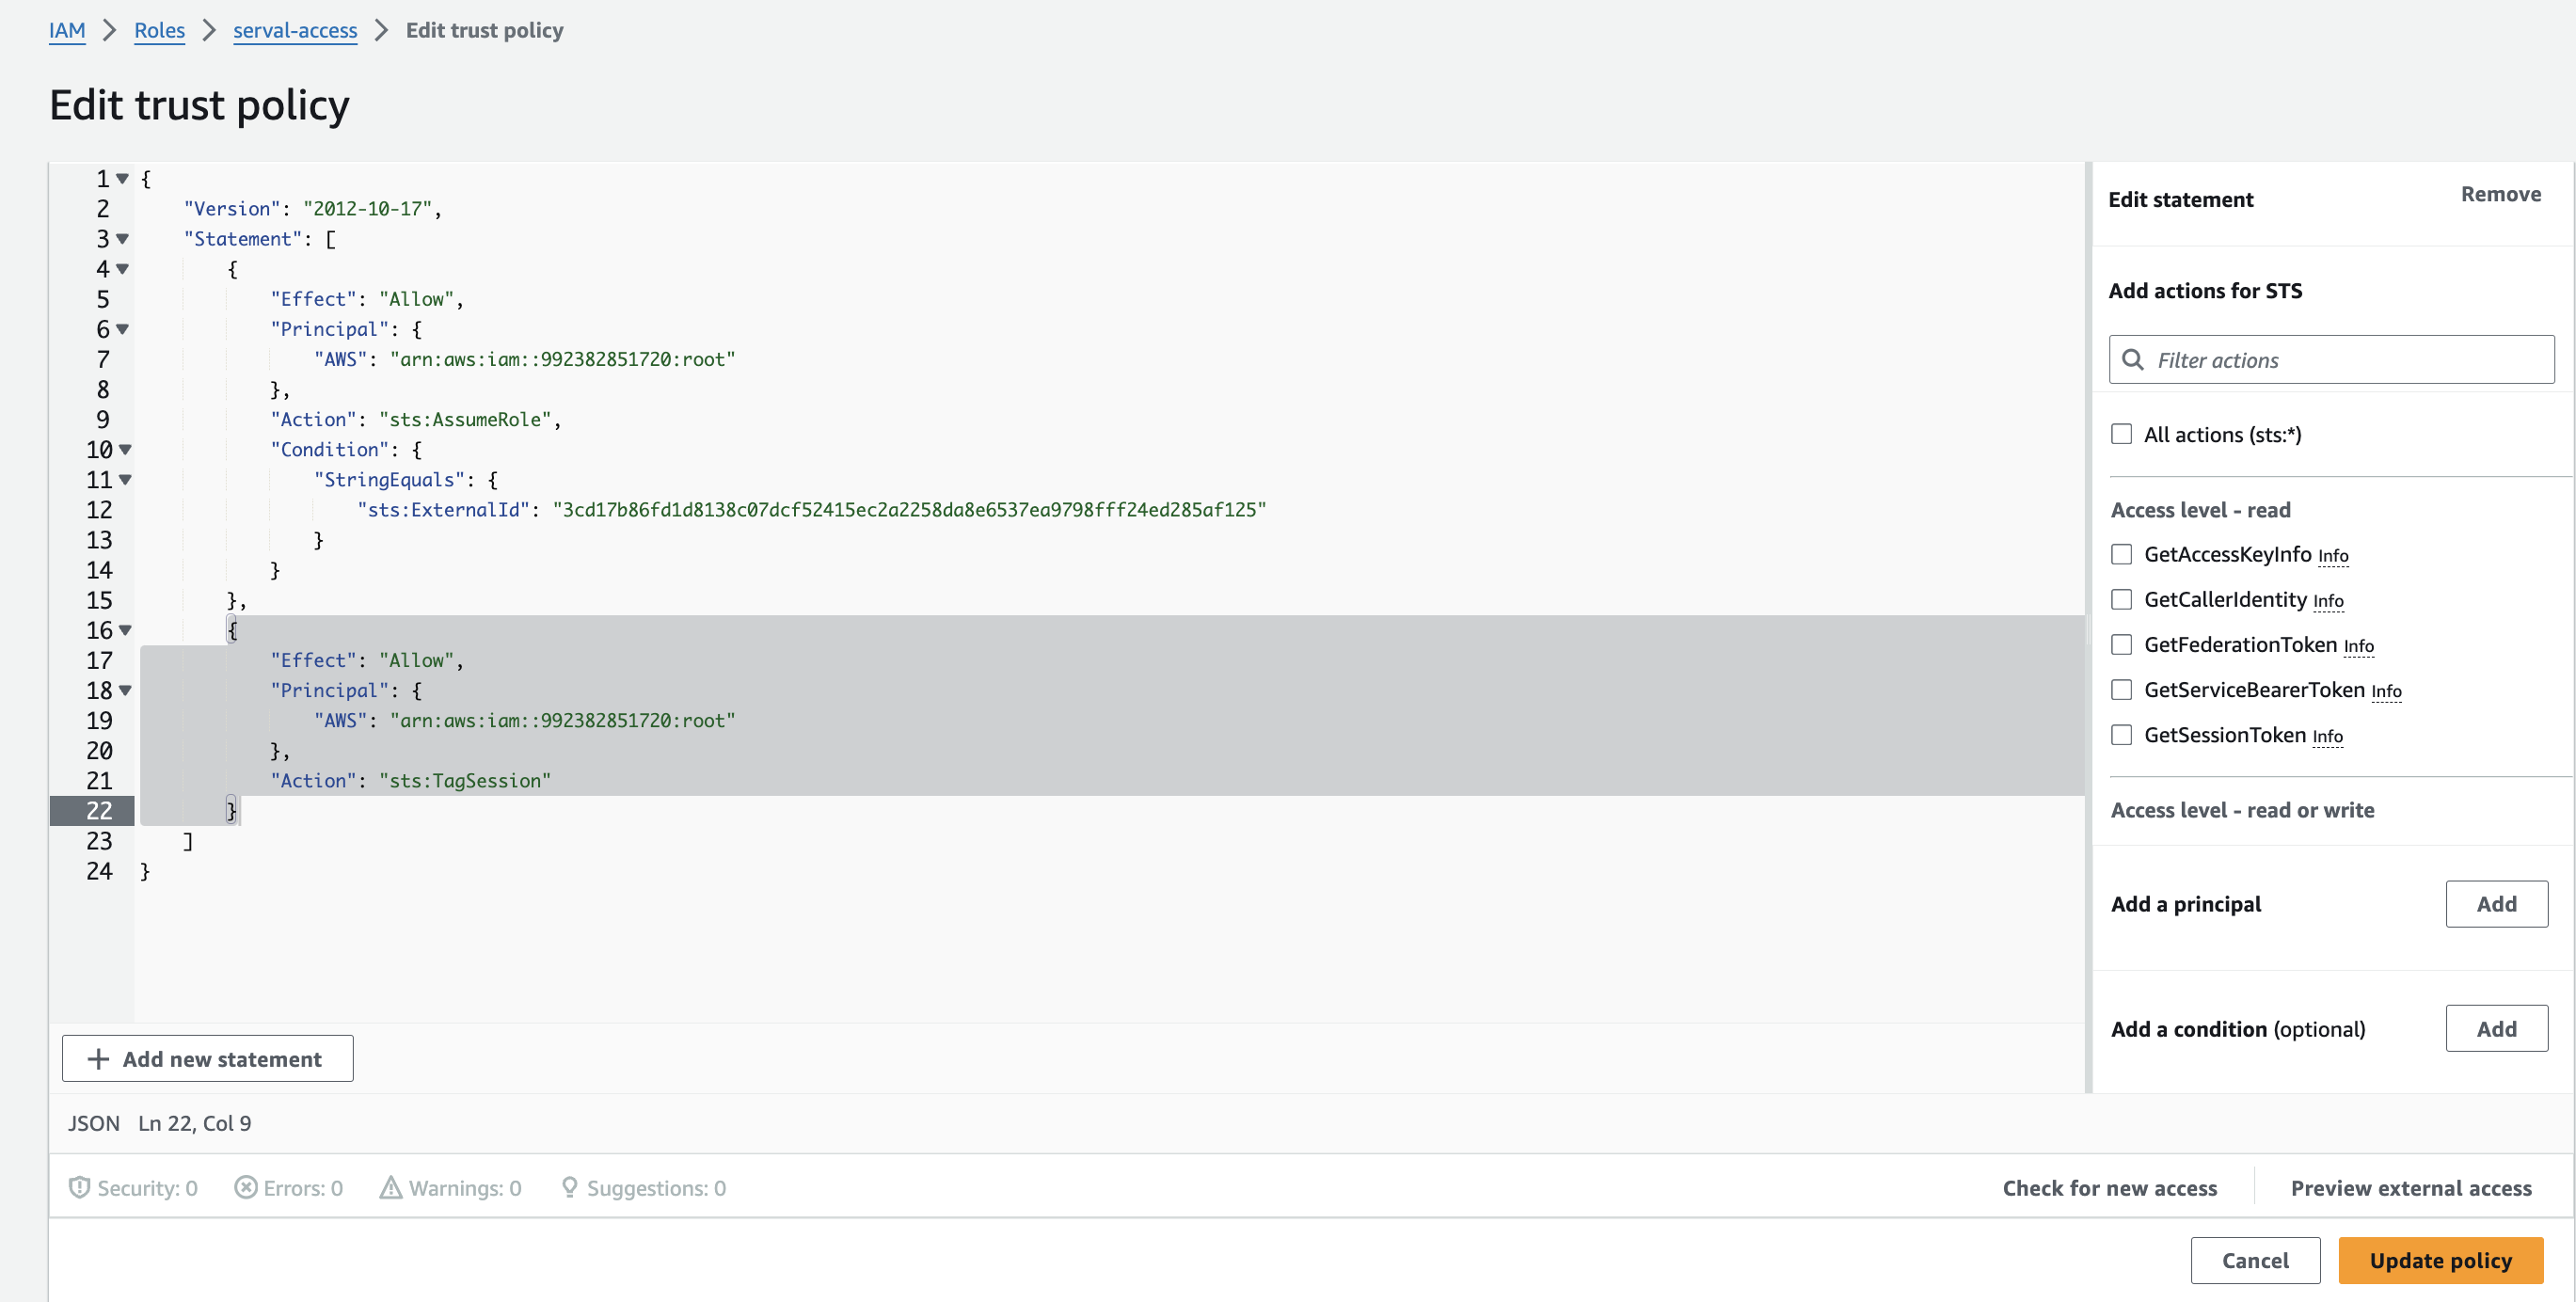
Open the new role → Trust relationships → Edit trust policy and replace the document with the version below (adds the requiredsts:TagSessionaction).\.png?fit=max&auto=format&n=GwC92x9foS4UfJjd&q=85&s=c243ea675ef197162585a9ef993b4a28)
- Here is an example of the updated policy in the UI.

- Copy the Role ARN & Account ID — you will paste these into Serval in the next section.
Serval Configuration
- Return to the AWS connection modal in Serval.
- Paste the Role ARN and Account ID, then click Save.


