Accessing Team Settings
To configure ticket attributes for your team, navigate to the team settings panel: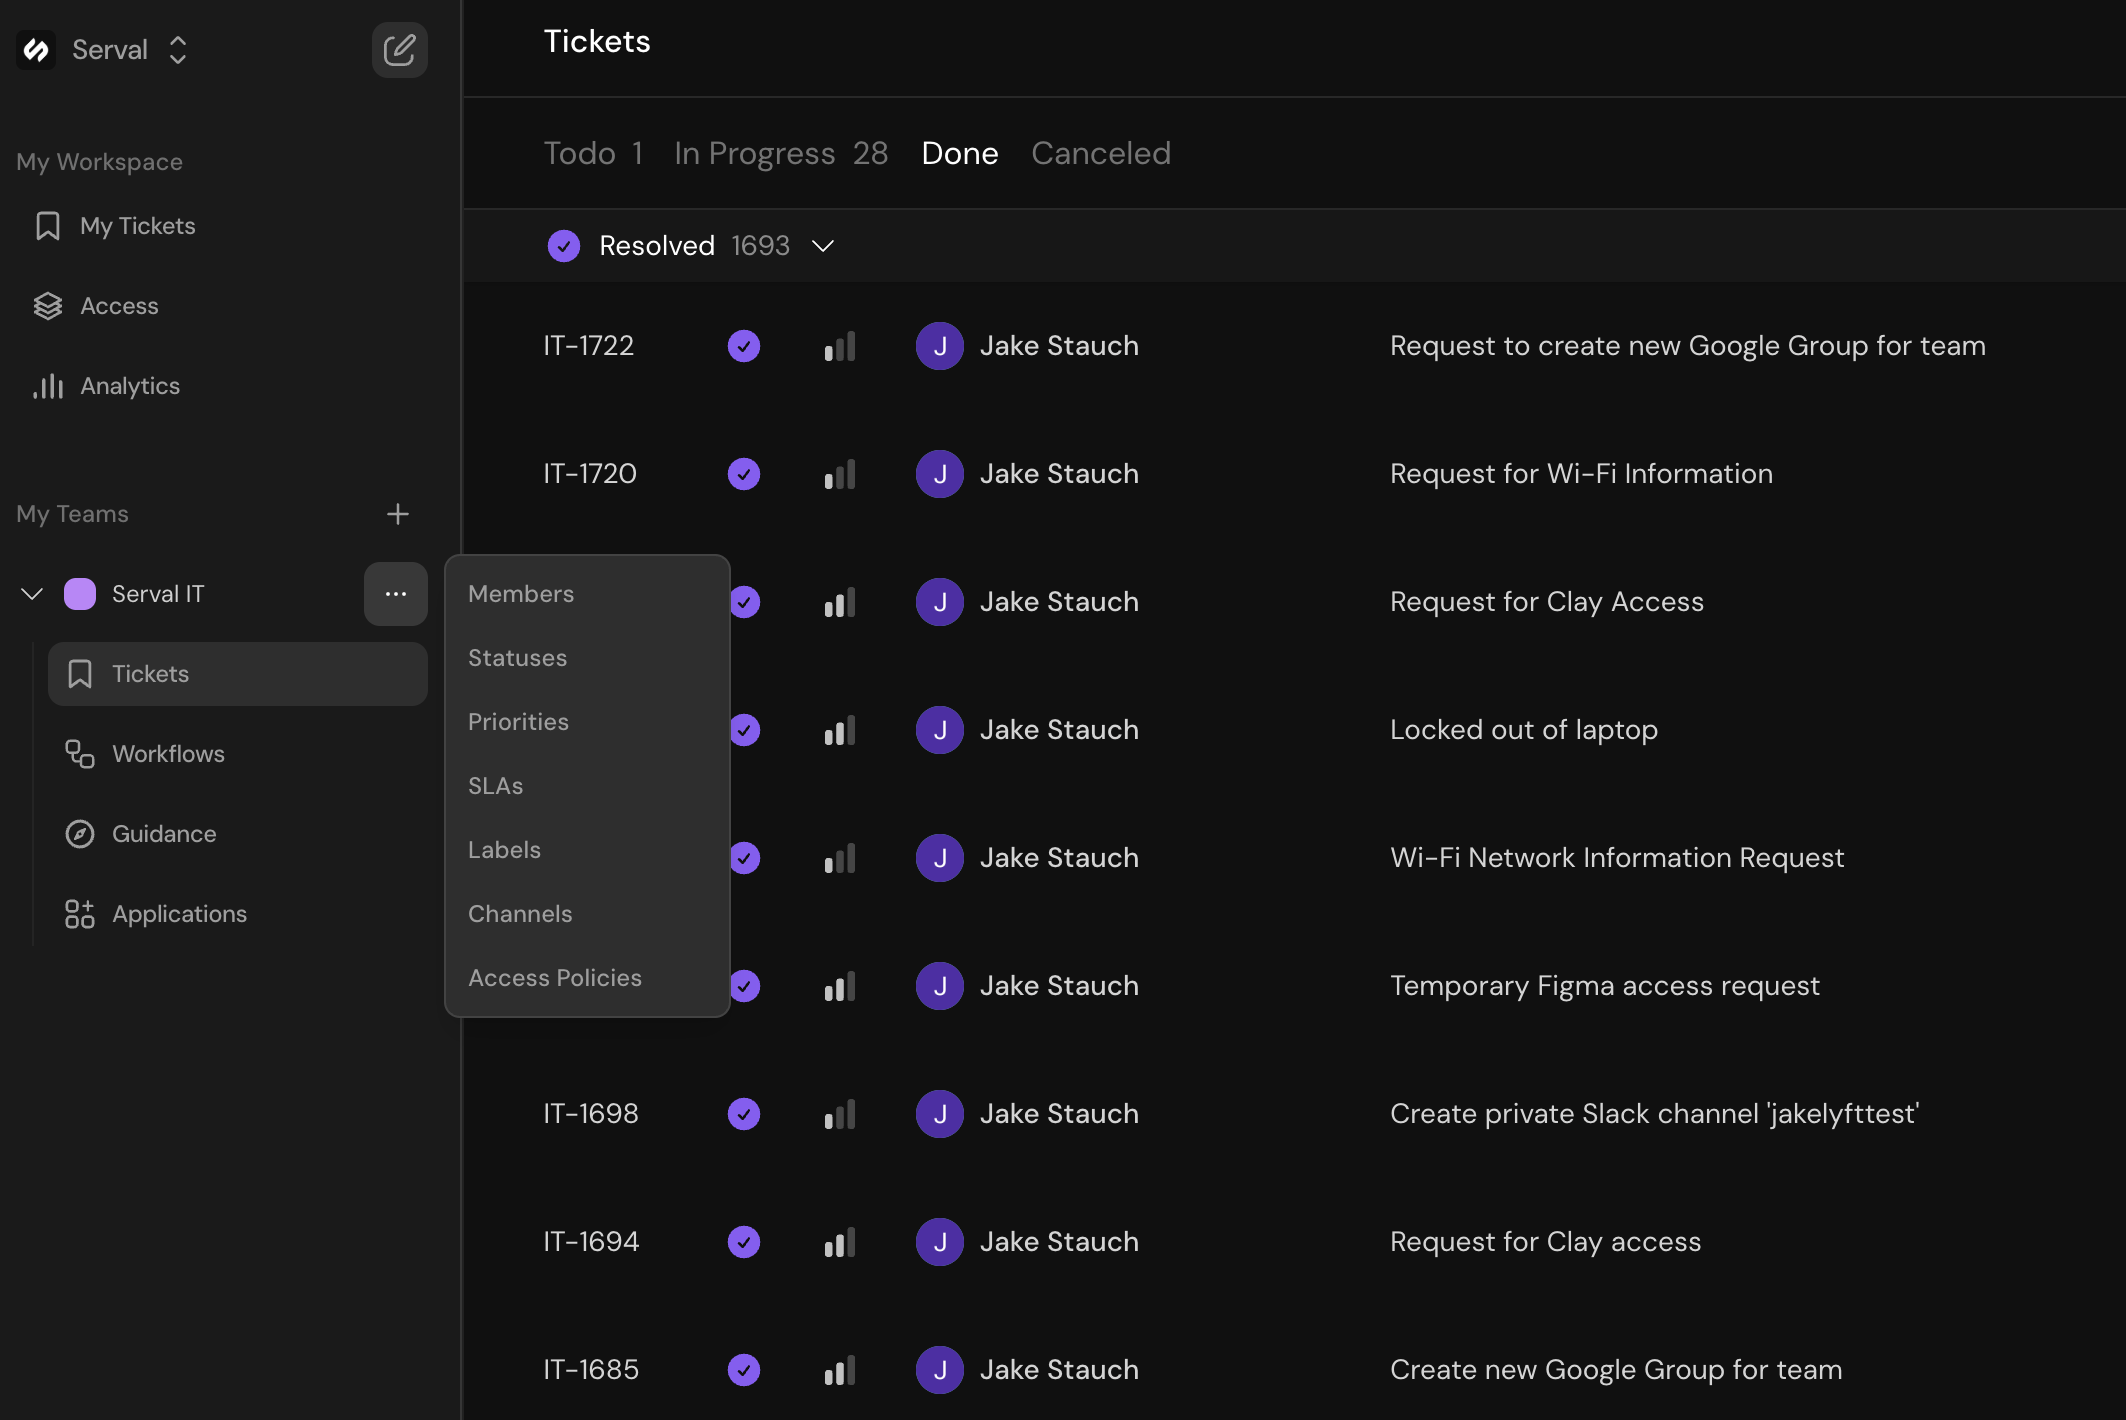
Ticket Attributes Overview
When viewing a ticket, the right-hand panel displays all ticket attributes:Title
Brief summary of the ticket’s main issue or request
Description
Detailed explanation of the problem or request
Requester
The person who created the ticket
Assignee
The team member responsible for resolving the ticket
Status
Current state of the ticket within your workflow
Priority
Urgency level that determines SLA requirements
SLA
Service Level Agreement timeline for resolution
Labels
Custom tags for categorization and filtering
Workflows
Automated processes that have run on the ticket
Relevant Guidance
Guidance that Serval identified as helpful
External Links
Connections to third-party ticketing systems
By default, tickets are assigned to Serval. The AI will continue working on the ticket until it either resolves the issue or escalates to a human agent when it cannot find a solution.
Configuring Statuses
Statuses help track the progress of tickets through your support workflow. Each team can create custom statuses tailored to their specific needs.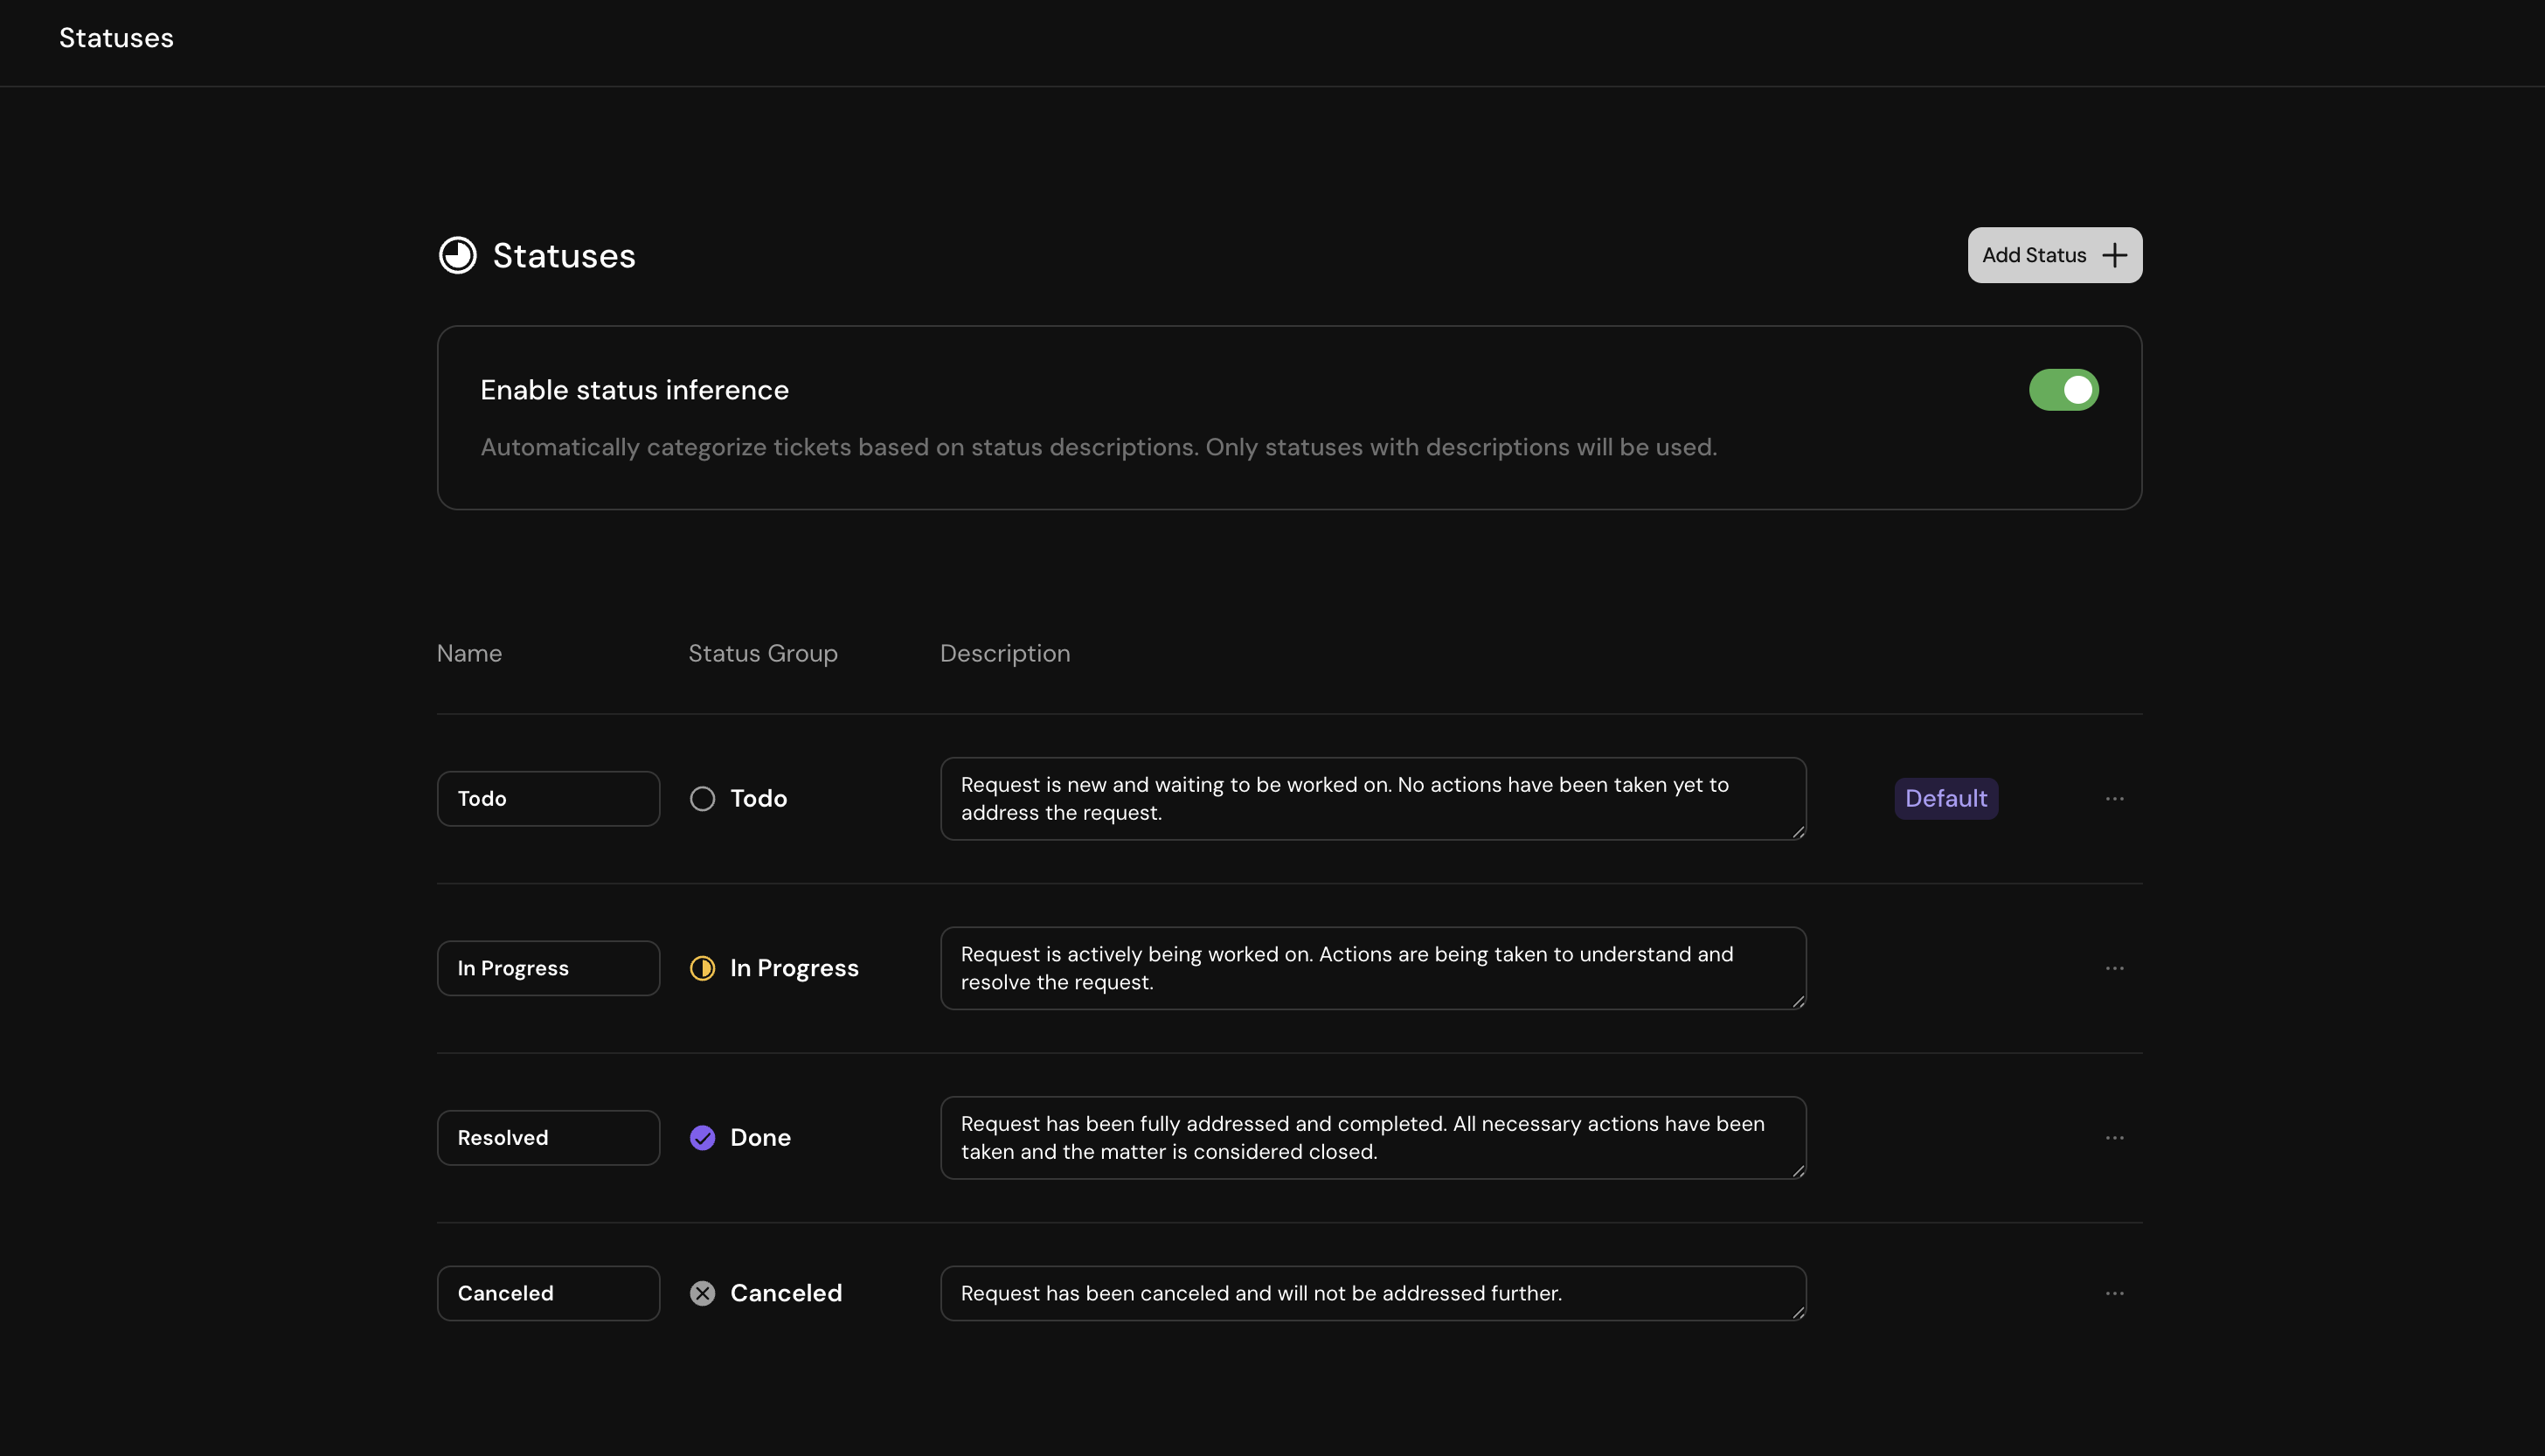
Status Categories
All custom statuses must be assigned to one of four categories:Creating a New Status
To create a custom status: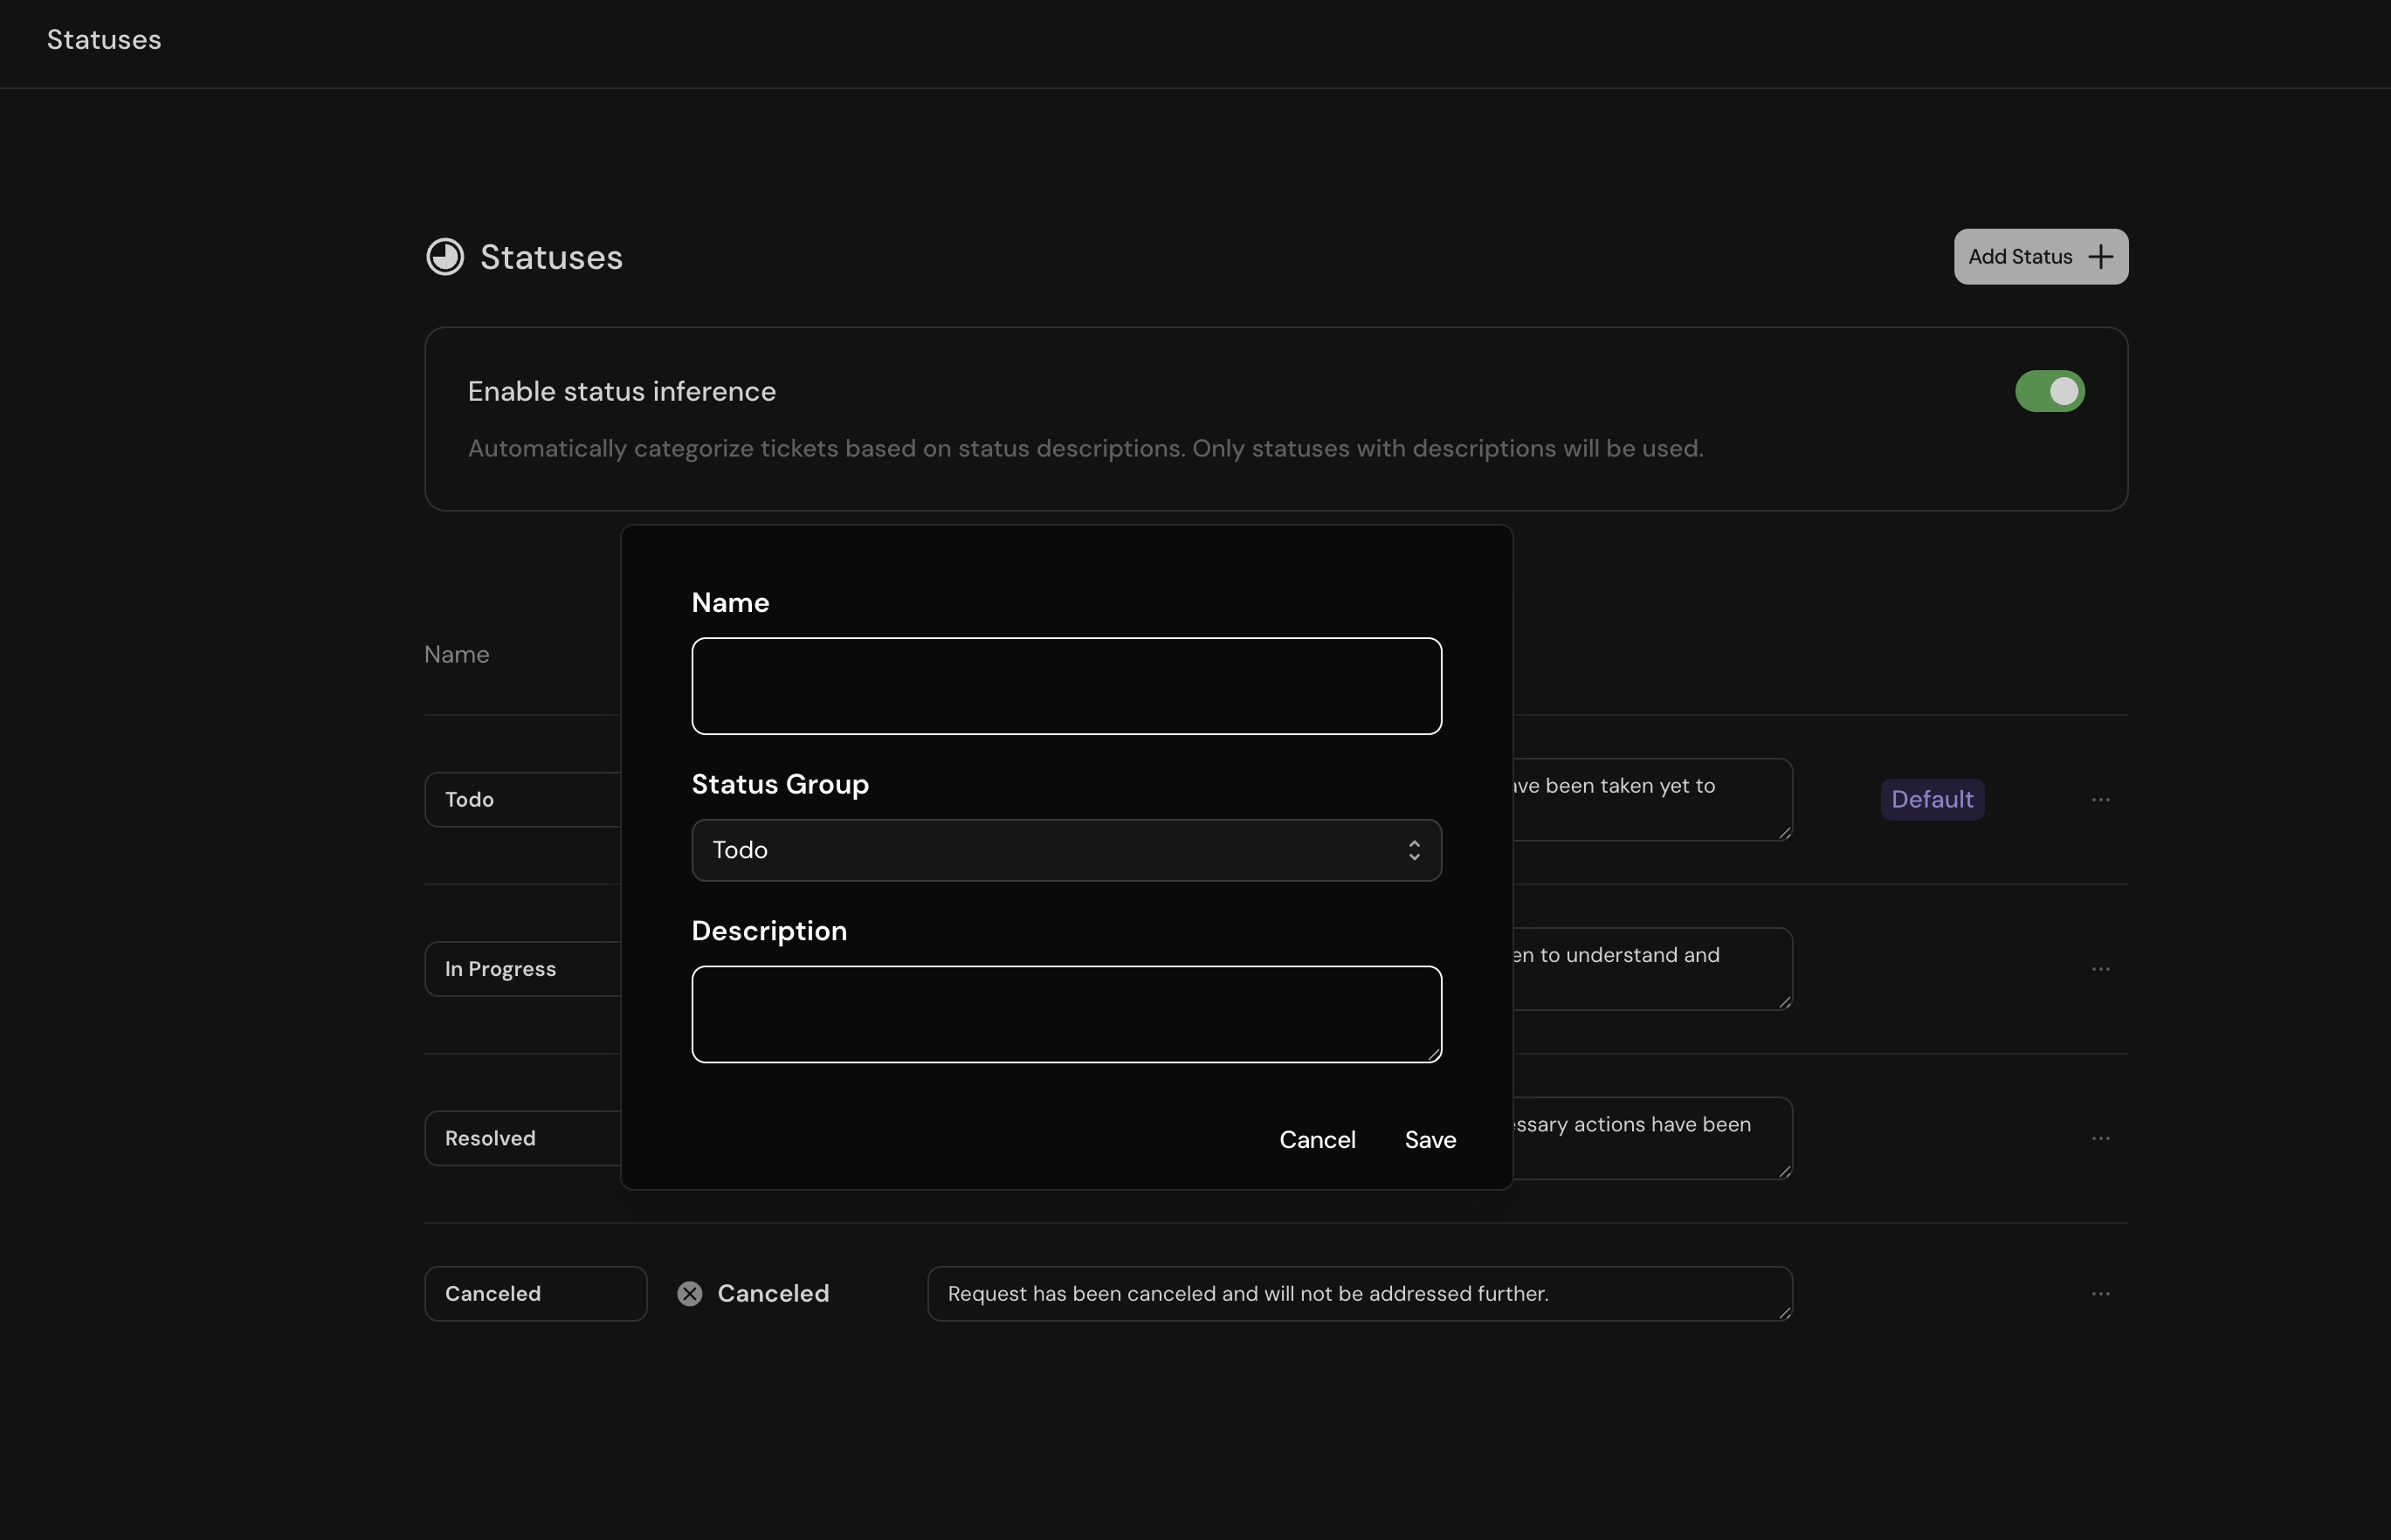
- Click Add Status on the statuses page
- Enter a descriptive name for the status
- Select the appropriate status category
- Provide a detailed description (this helps Serval’s AI assign statuses automatically)
- Click Create
Setting a Default Status
Every team must have at least one “To Do” status set as default. This will be applied to all new tickets:

Managing Priorities
Priorities determine how urgently tickets should be addressed and trigger corresponding SLA rules.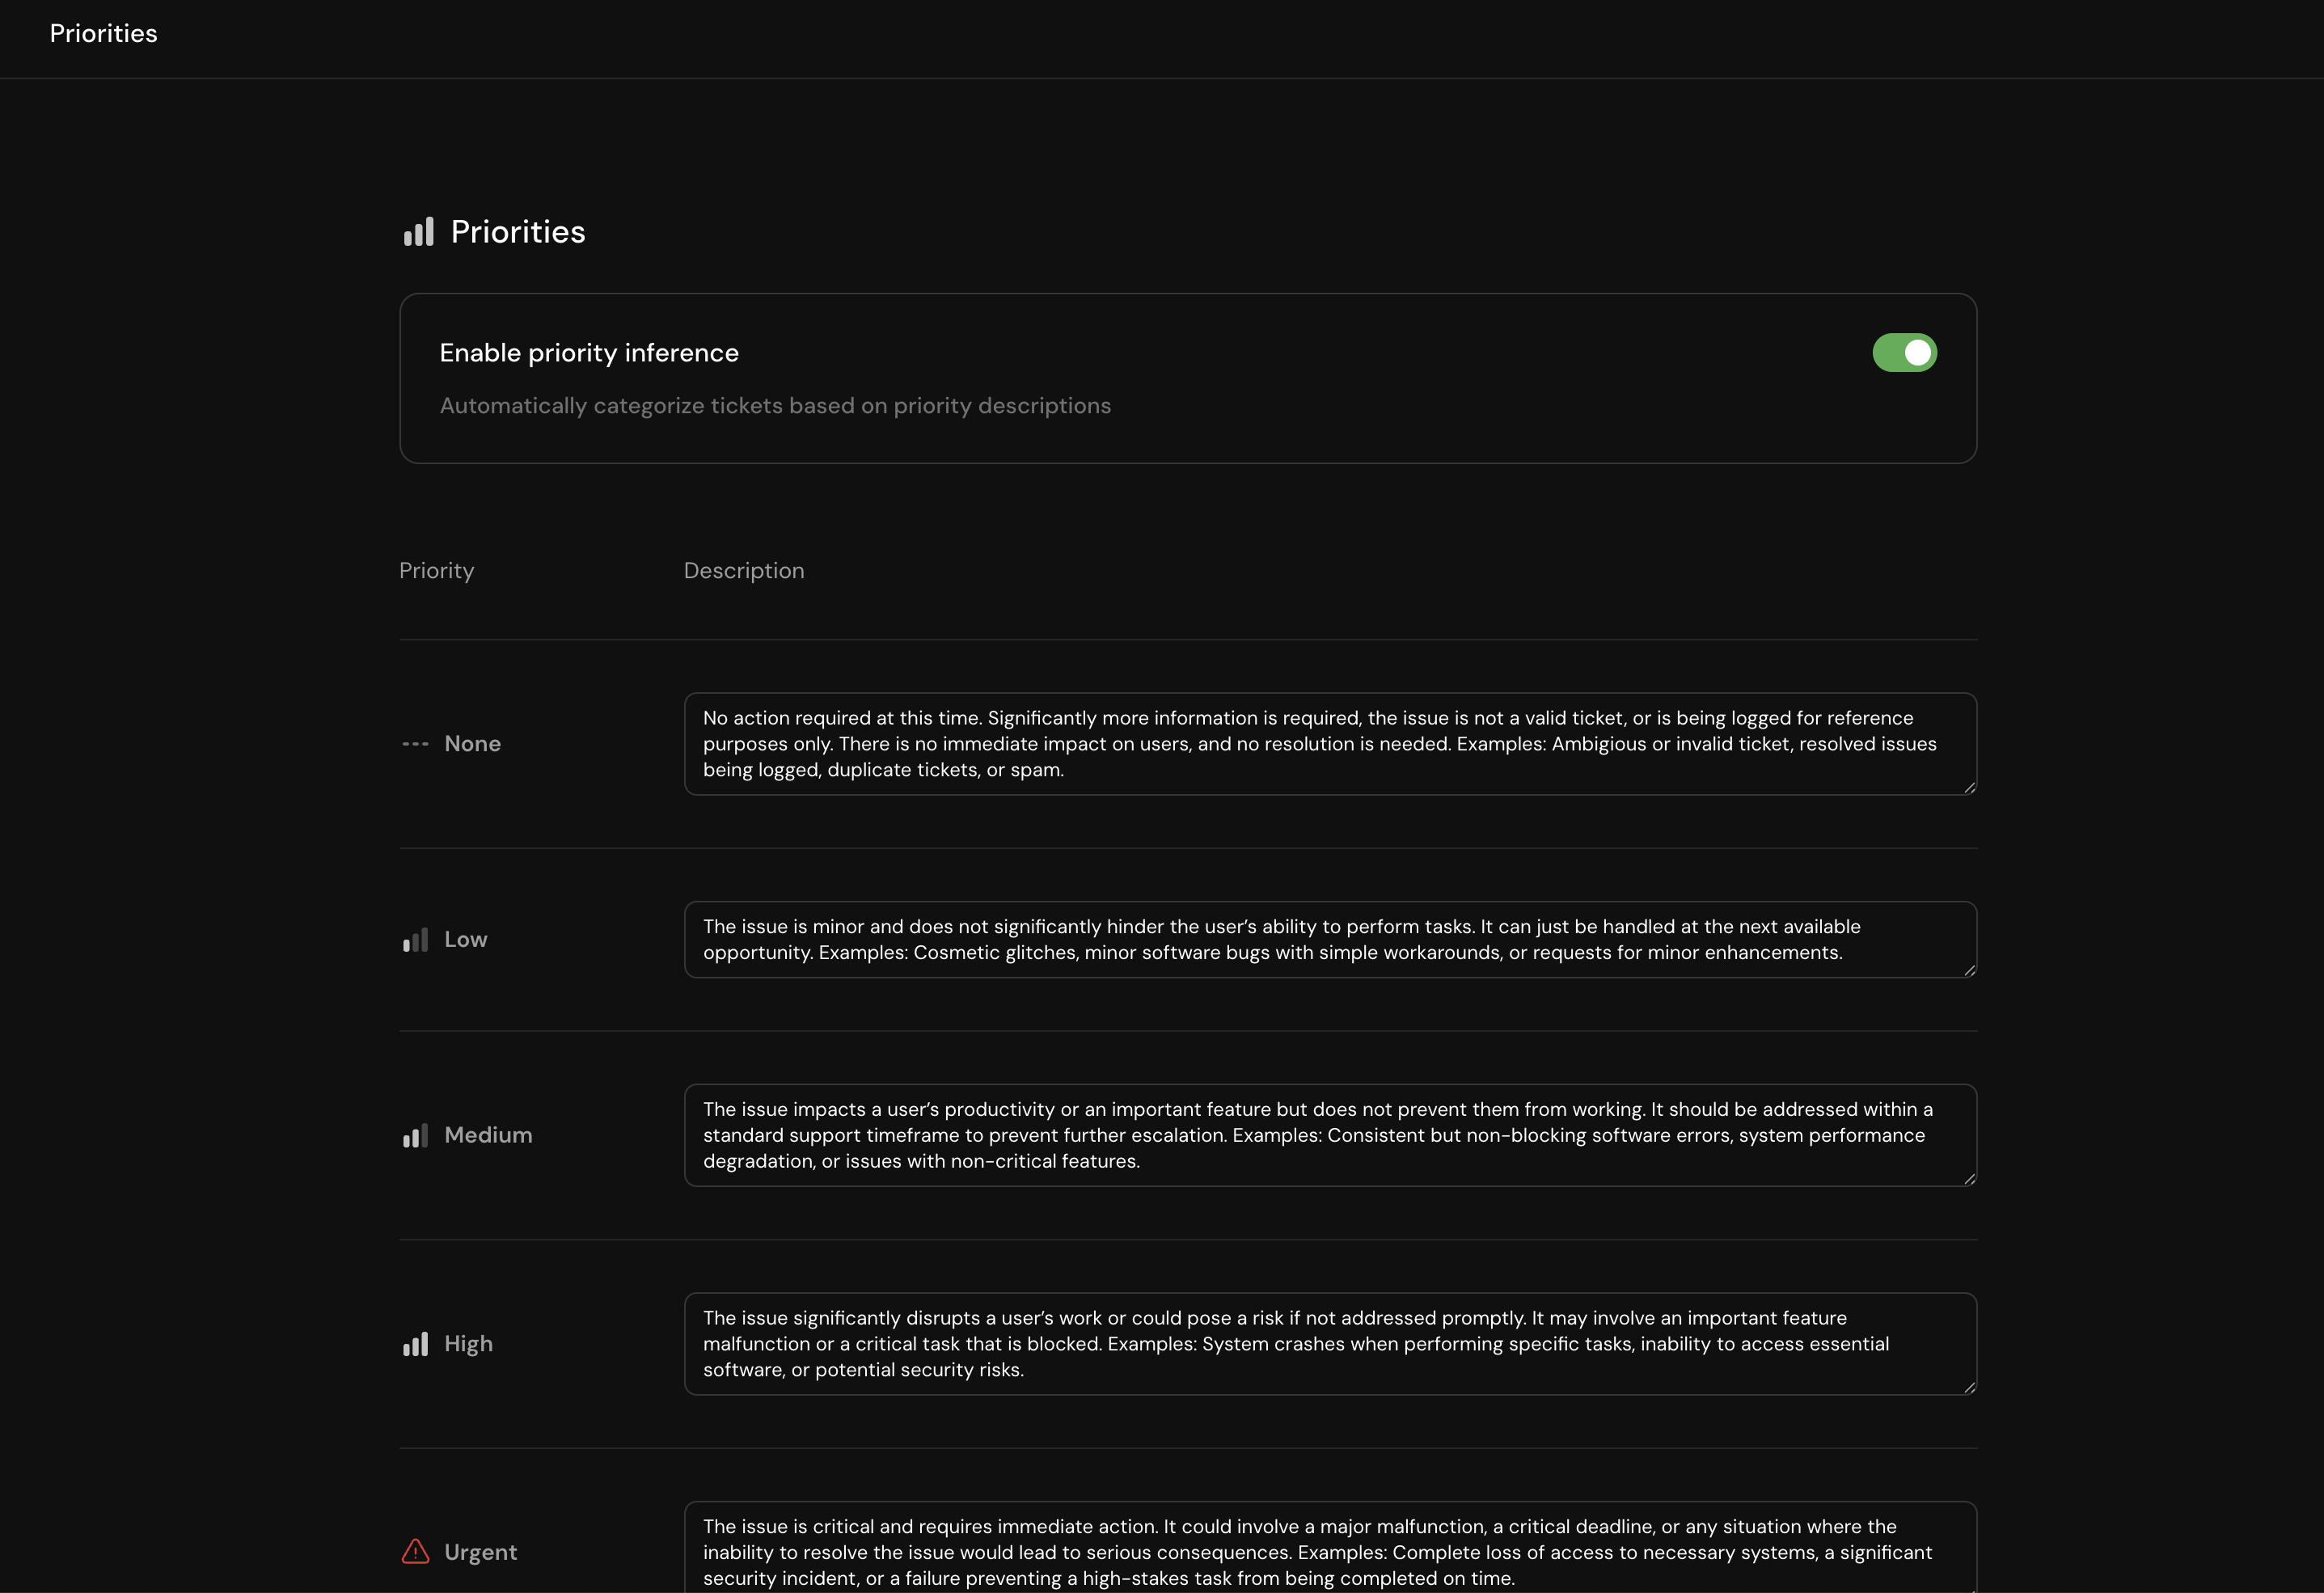
Configuring Priorities
When setting up priorities:- Name: Choose clear, meaningful priority levels (e.g., Critical, High, Medium, Low)
- Description: Provide detailed criteria for when each priority should be applied
- Examples: Include real-world scenarios to improve AI accuracy
Serval’s AI analyzes ticket messages and automatically assigns priorities based on your descriptions. The more specific your criteria and examples, the better the automatic prioritization will work.
SLA Rules
Service Level Agreements ensure tickets are resolved within appropriate timeframes based on their priority.
Creating SLA Rules
SLA rules map priorities to resolution timeframes:
Labels
Labels provide a flexible way to categorize and visually organize tickets in your queue.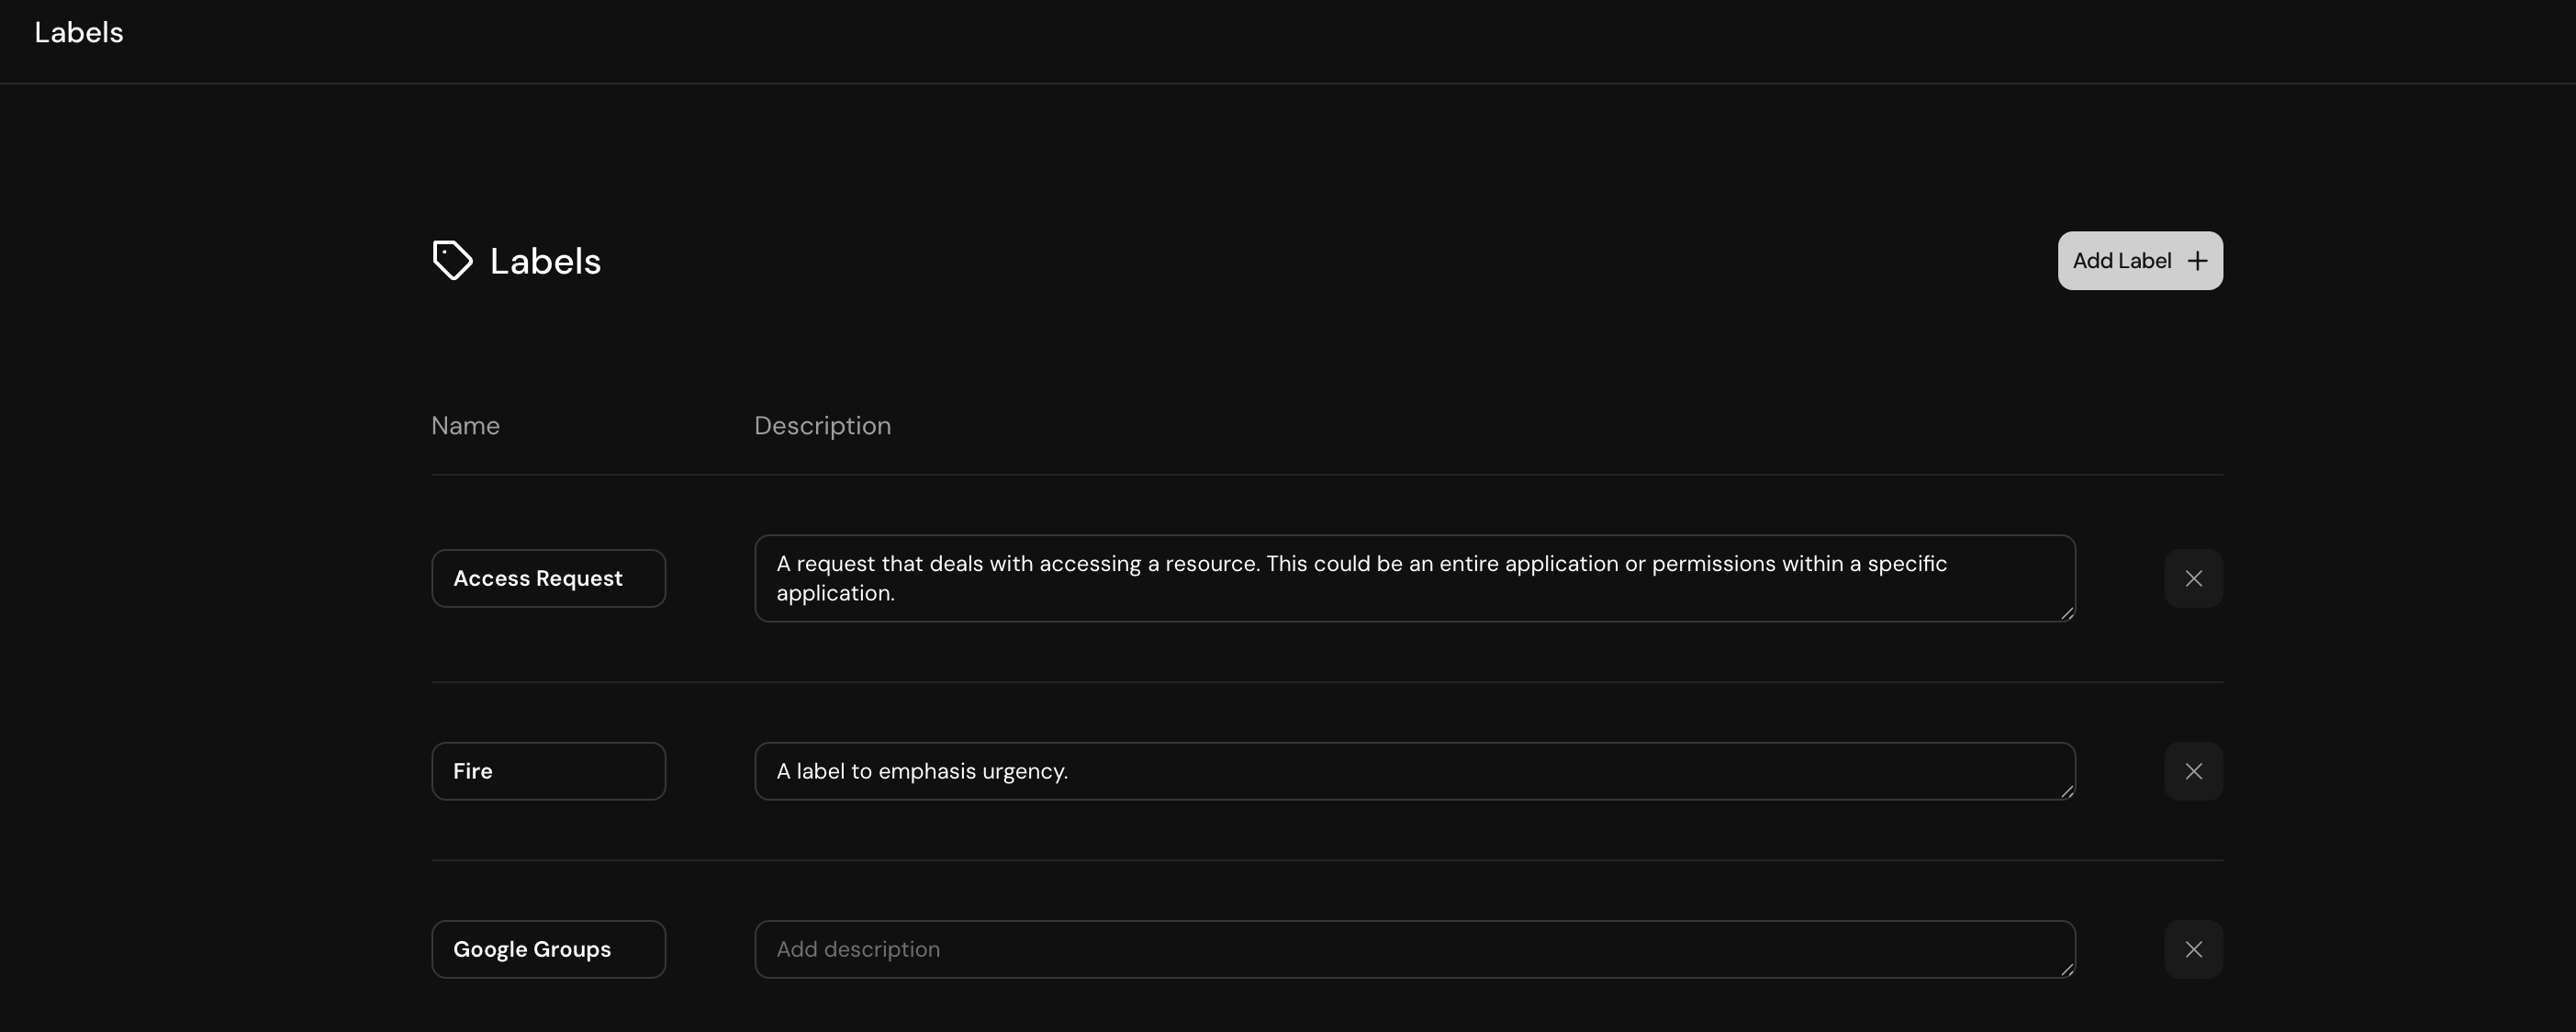
Creating Labels
To add a new label:- Click Add Label on the labels page
- Enter a name for the label
- Choose a color for visual identification
- Provide a description to help team members use labels consistently
Communication Channels
Channels define how tickets enter your Serval workspace, whether through Slack, email, or other integrations.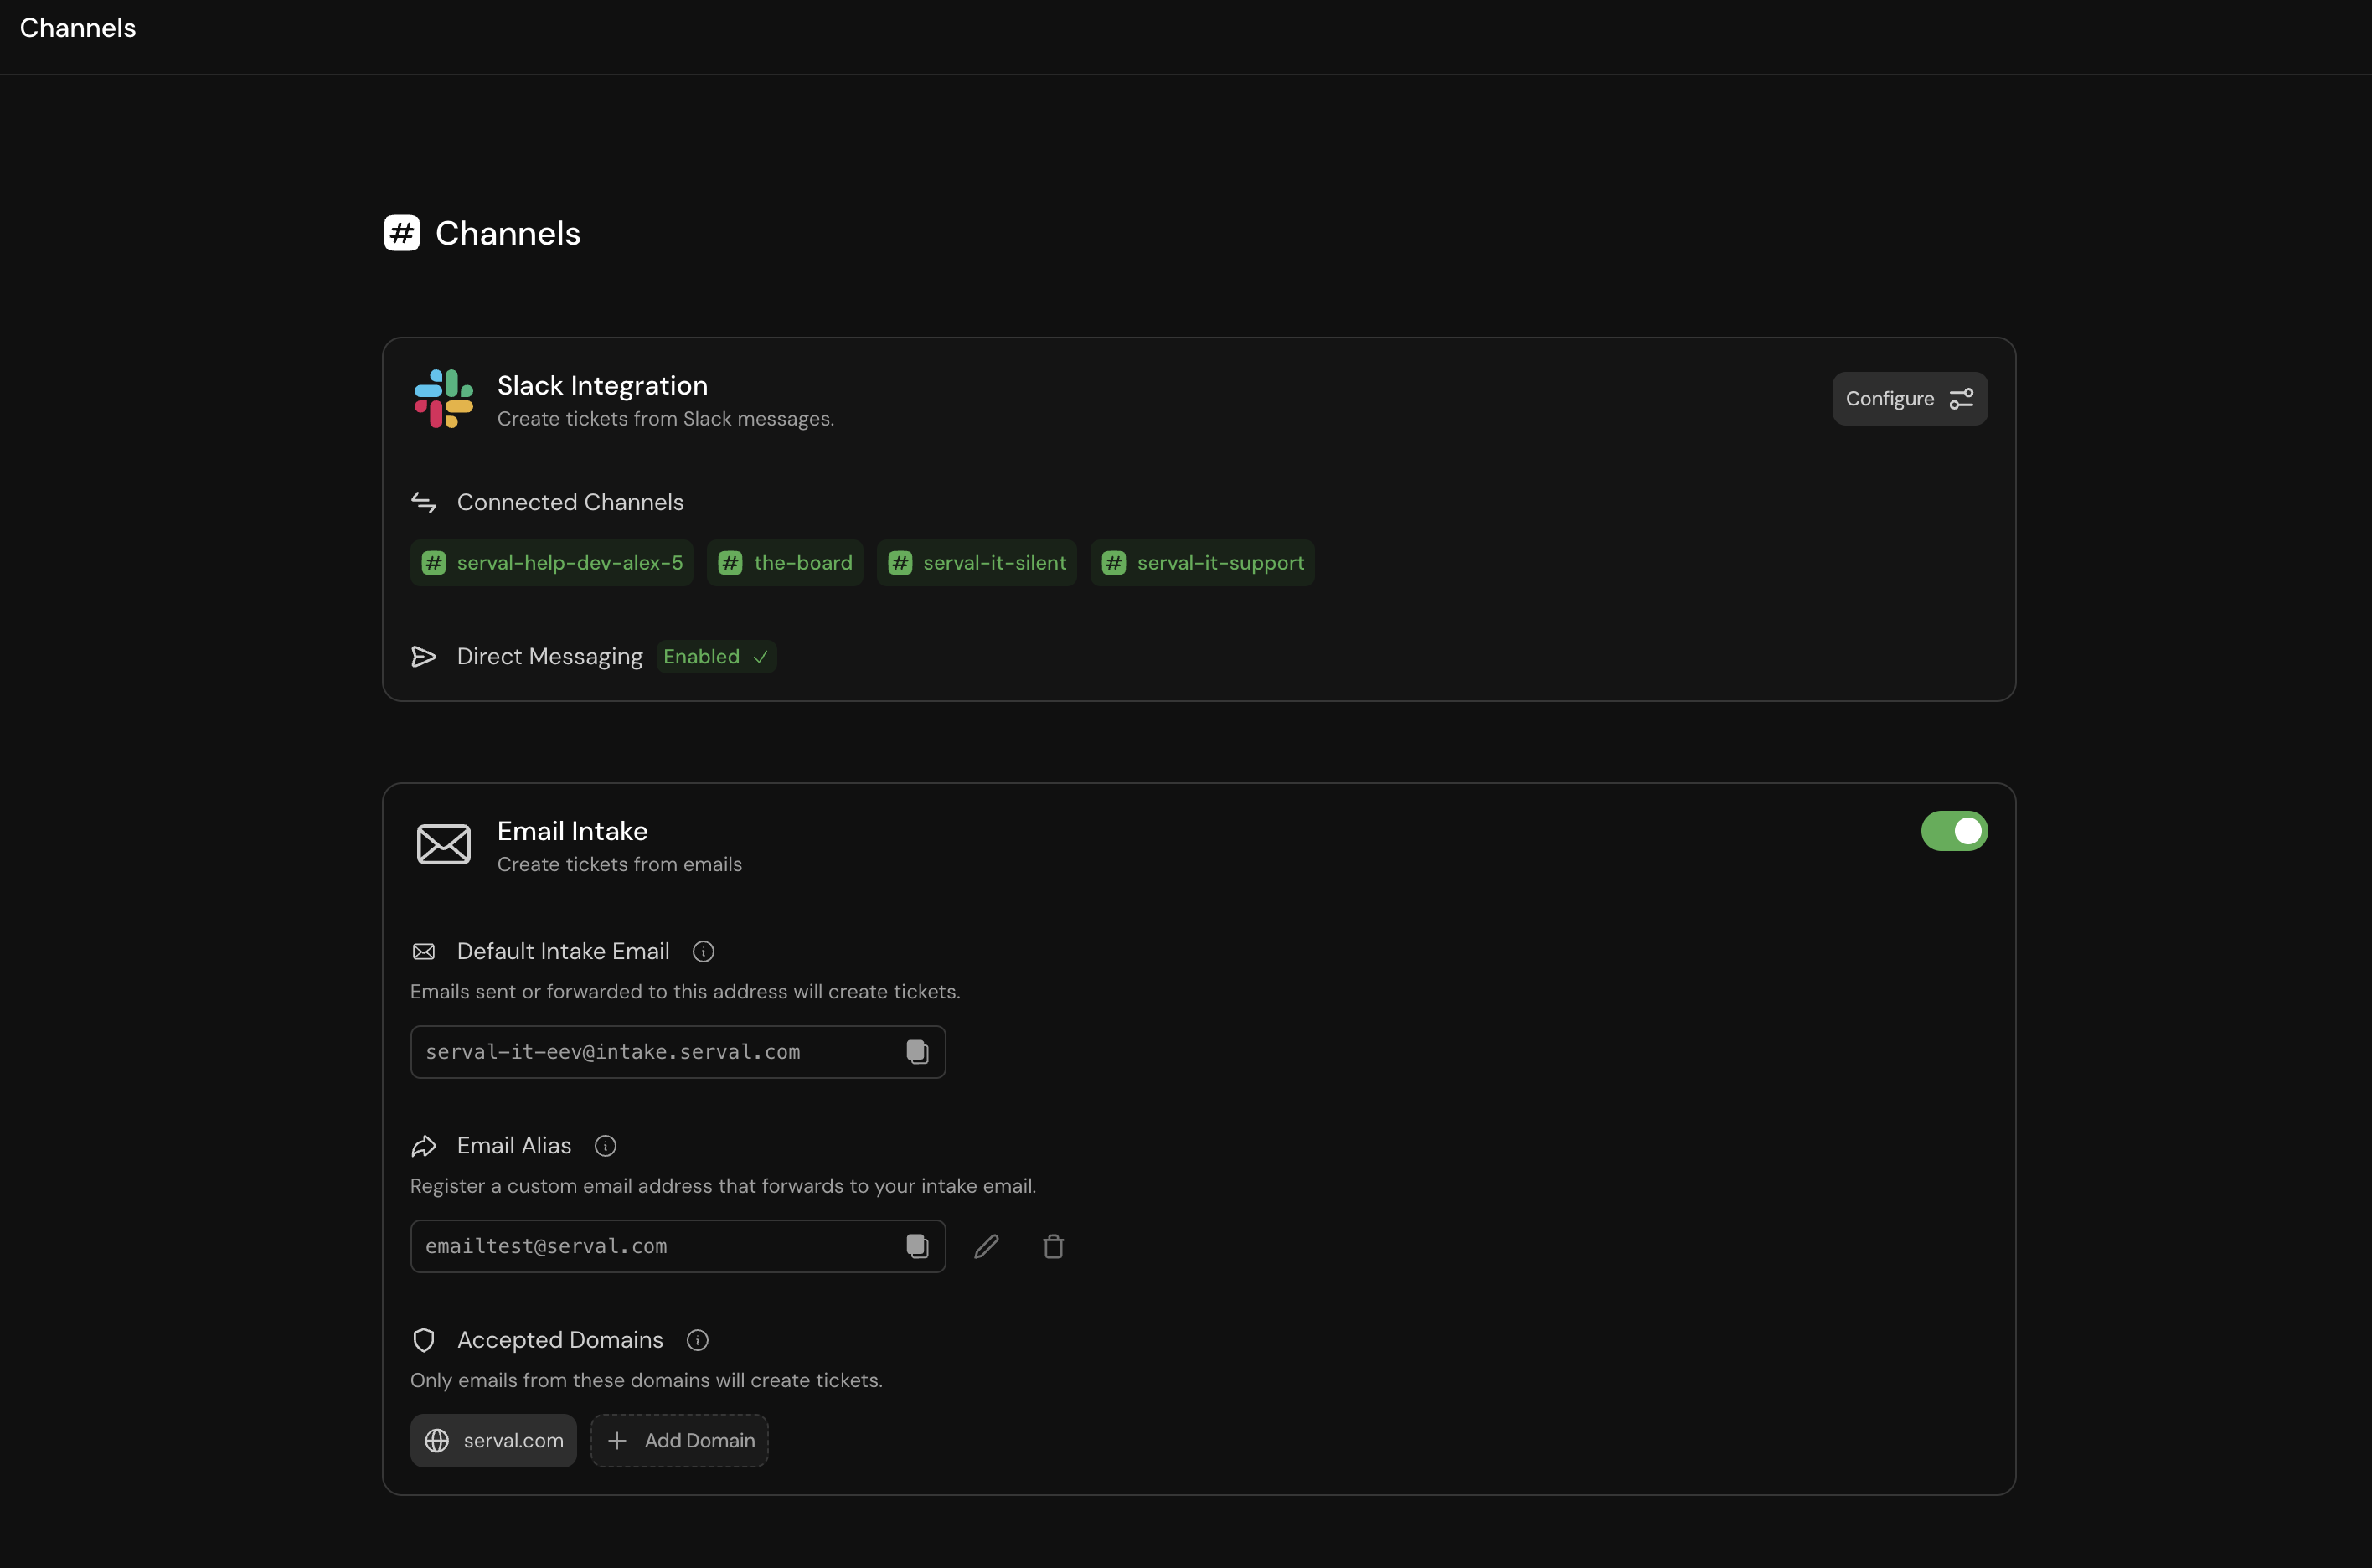
Slack Integration
Configure Slack channels to receive tickets directly within your workspace:
Serval supports both channel-based ticketing and direct messages. Users can create tickets by messaging the Serval app directly in Slack.
Email Intake
Set up email channels to accept tickets from specific domains: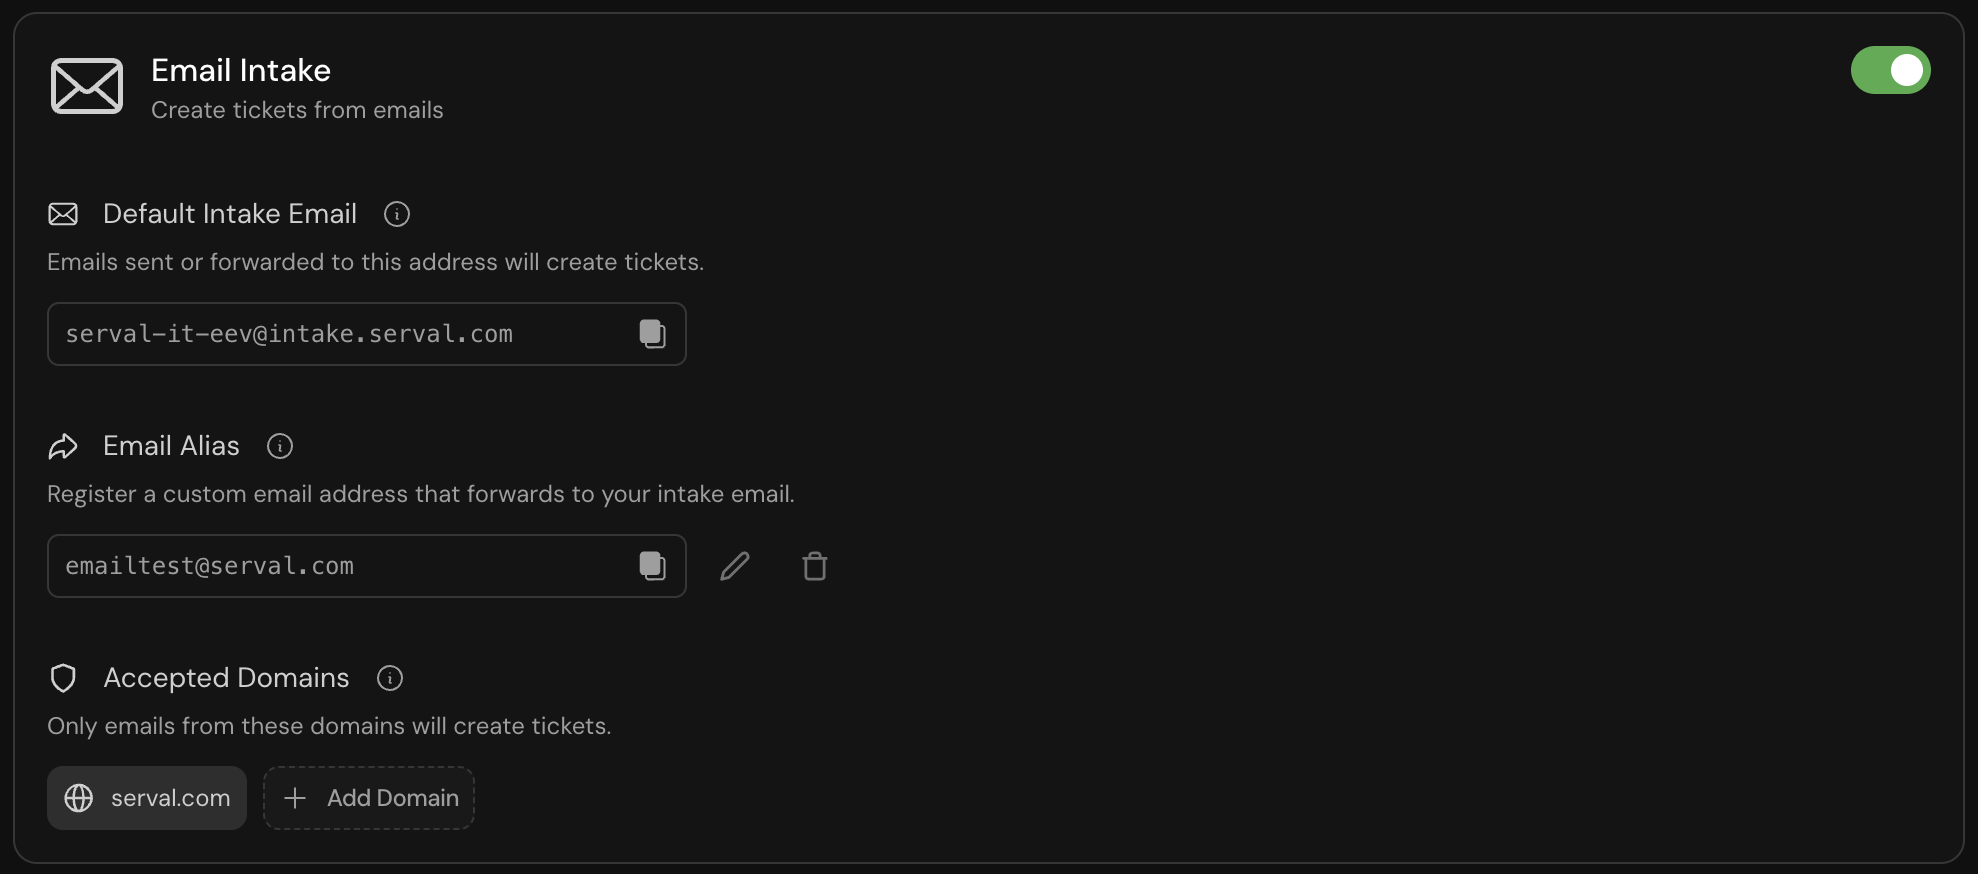
Best Practices
Status Configuration
Status Configuration
- Create statuses that reflect your actual workflow stages
- Use clear, action-oriented names (e.g., “Awaiting Customer Response” instead of “Pending”)
- Provide detailed descriptions with examples to improve AI accuracy
- Regularly review and update status definitions based on usage patterns
Priority Management
Priority Management
- Define priorities based on business impact, not just urgency
- Include specific criteria like affected user count, revenue impact, or system criticality
- Use examples from real incidents to train the AI
- Align priority levels with your SLA commitments
Label Strategy
Label Strategy
- Create a consistent labeling taxonomy across teams
- Use labels for categorization that doesn’t fit other attributes (e.g., product area, customer segment)
- Limit the number of labels to maintain usability
- Document label usage guidelines for your team
Channel Optimization
Channel Optimization
- Configure separate channels for different types of requests
- Use descriptive channel names that guide users to the right place
- Monitor channel usage to identify opportunities for consolidation or expansion
- Set up auto-routing rules with strong team descriptions

