Before You Start
- Navigate to your team in the left panel
- Select the Workflows tab
Create Your First Workflow
Start a new workflow
Click New Workflow in the top right corner. Choose a workflow type or let Serval decide based on your description
Describe what you want
Tell Serval what you want to automate in plain language. Be specific about:
- What the workflow should do
- When it should run (if not manual)
- Which apps it should connect to
- “Reset a user’s password in Okta and send them a Slack DM with instructions”
- “Every Monday at 9am, list open tickets older than 7 days and post to #it-ops”
-
“When a user is added to the Engineering group in Okta, add them to the engineering GitHub team”
Review the generated workflow
Watch as Serval builds your workflow in real-time. When complete, you’ll see: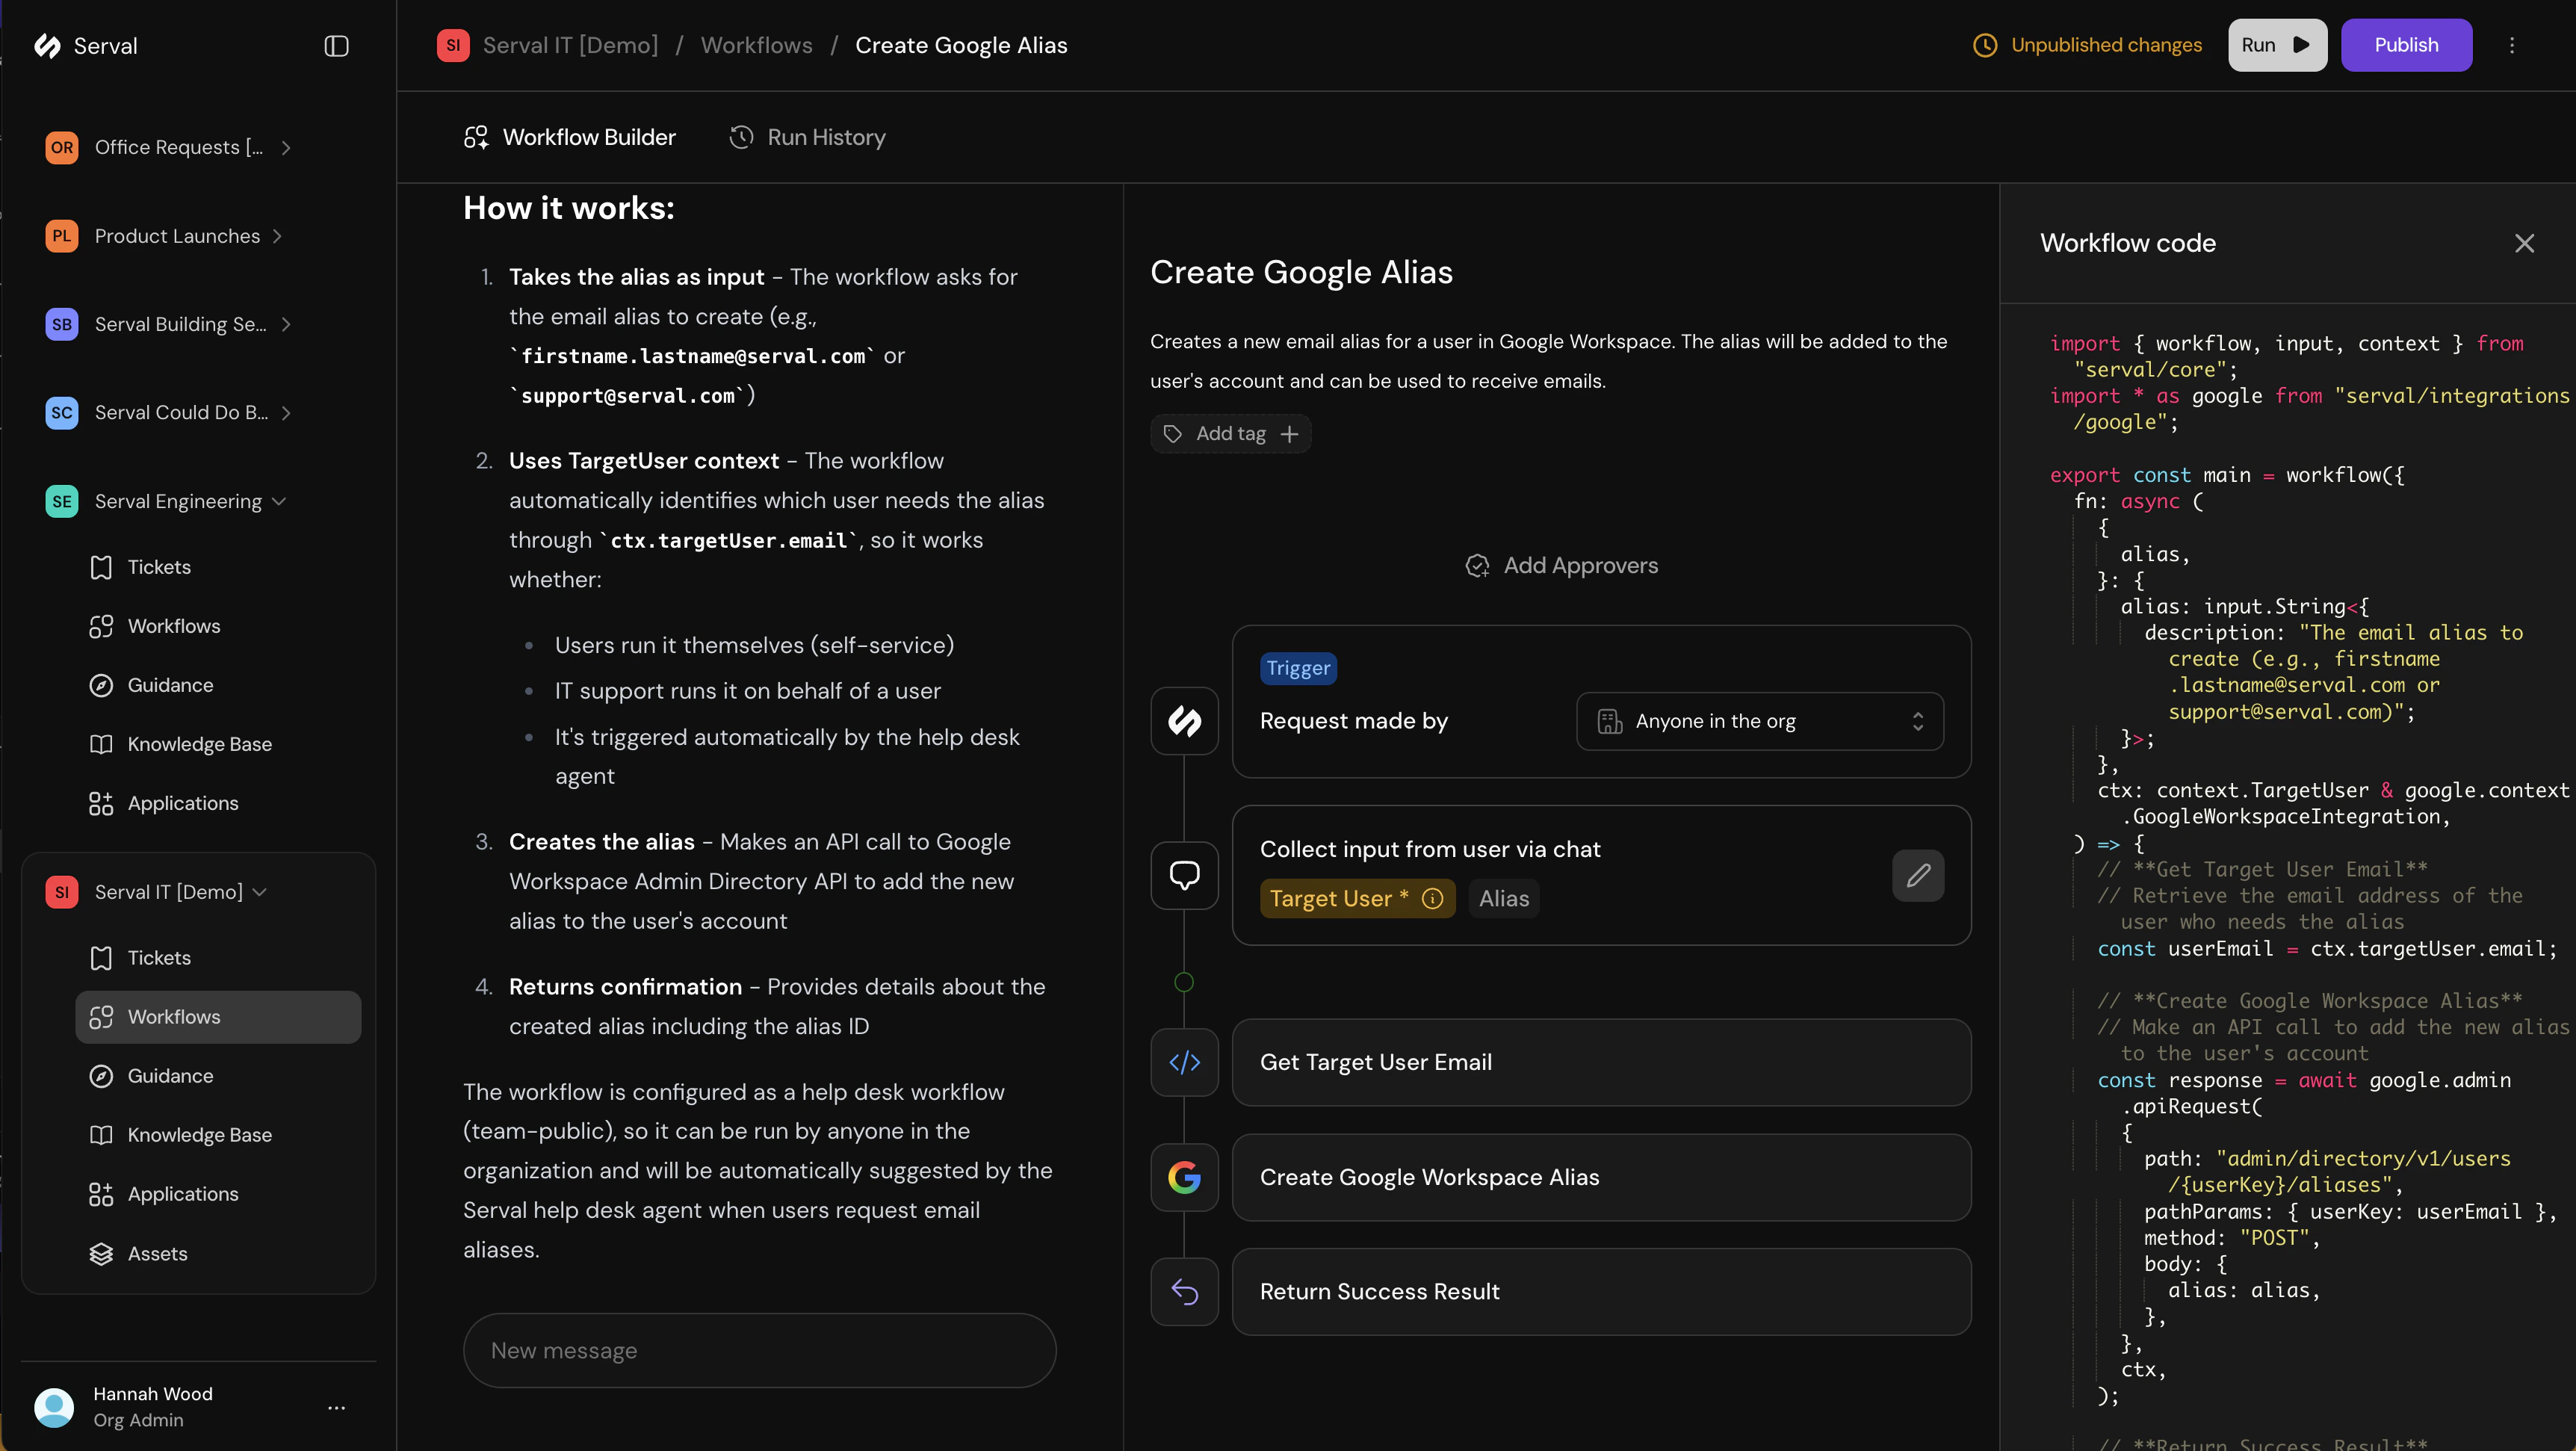
- A visual diagram of each step
- The generated code (editable if needed)
- A summary of what the workflow does
Test your workflow
Click Run to test the workflow before publishing. The run panel shows:
- Each step’s execution status
- Input/output data at each step
- Any errors with details
Configure Your Workflow
After creating a workflow, you can configure additional settings:Workflow Types
Configure when workflows run: manually, on schedule, or via webhook
Approvals
Require approval before sensitive workflows execute
Inputs
Collect information from users before the workflow runs
Execution Scope
Control who can run the workflow: org-wide or team-only
Tips for Better Workflows
Be specific
“Reset Okta password” works better than “help with access”
Name your apps
Mention which integrations to use: “in Slack,” “via GitHub,” “using Okta”
Iterate
Start simple, test, then add complexity through follow-up prompts