Understanding Access Policies
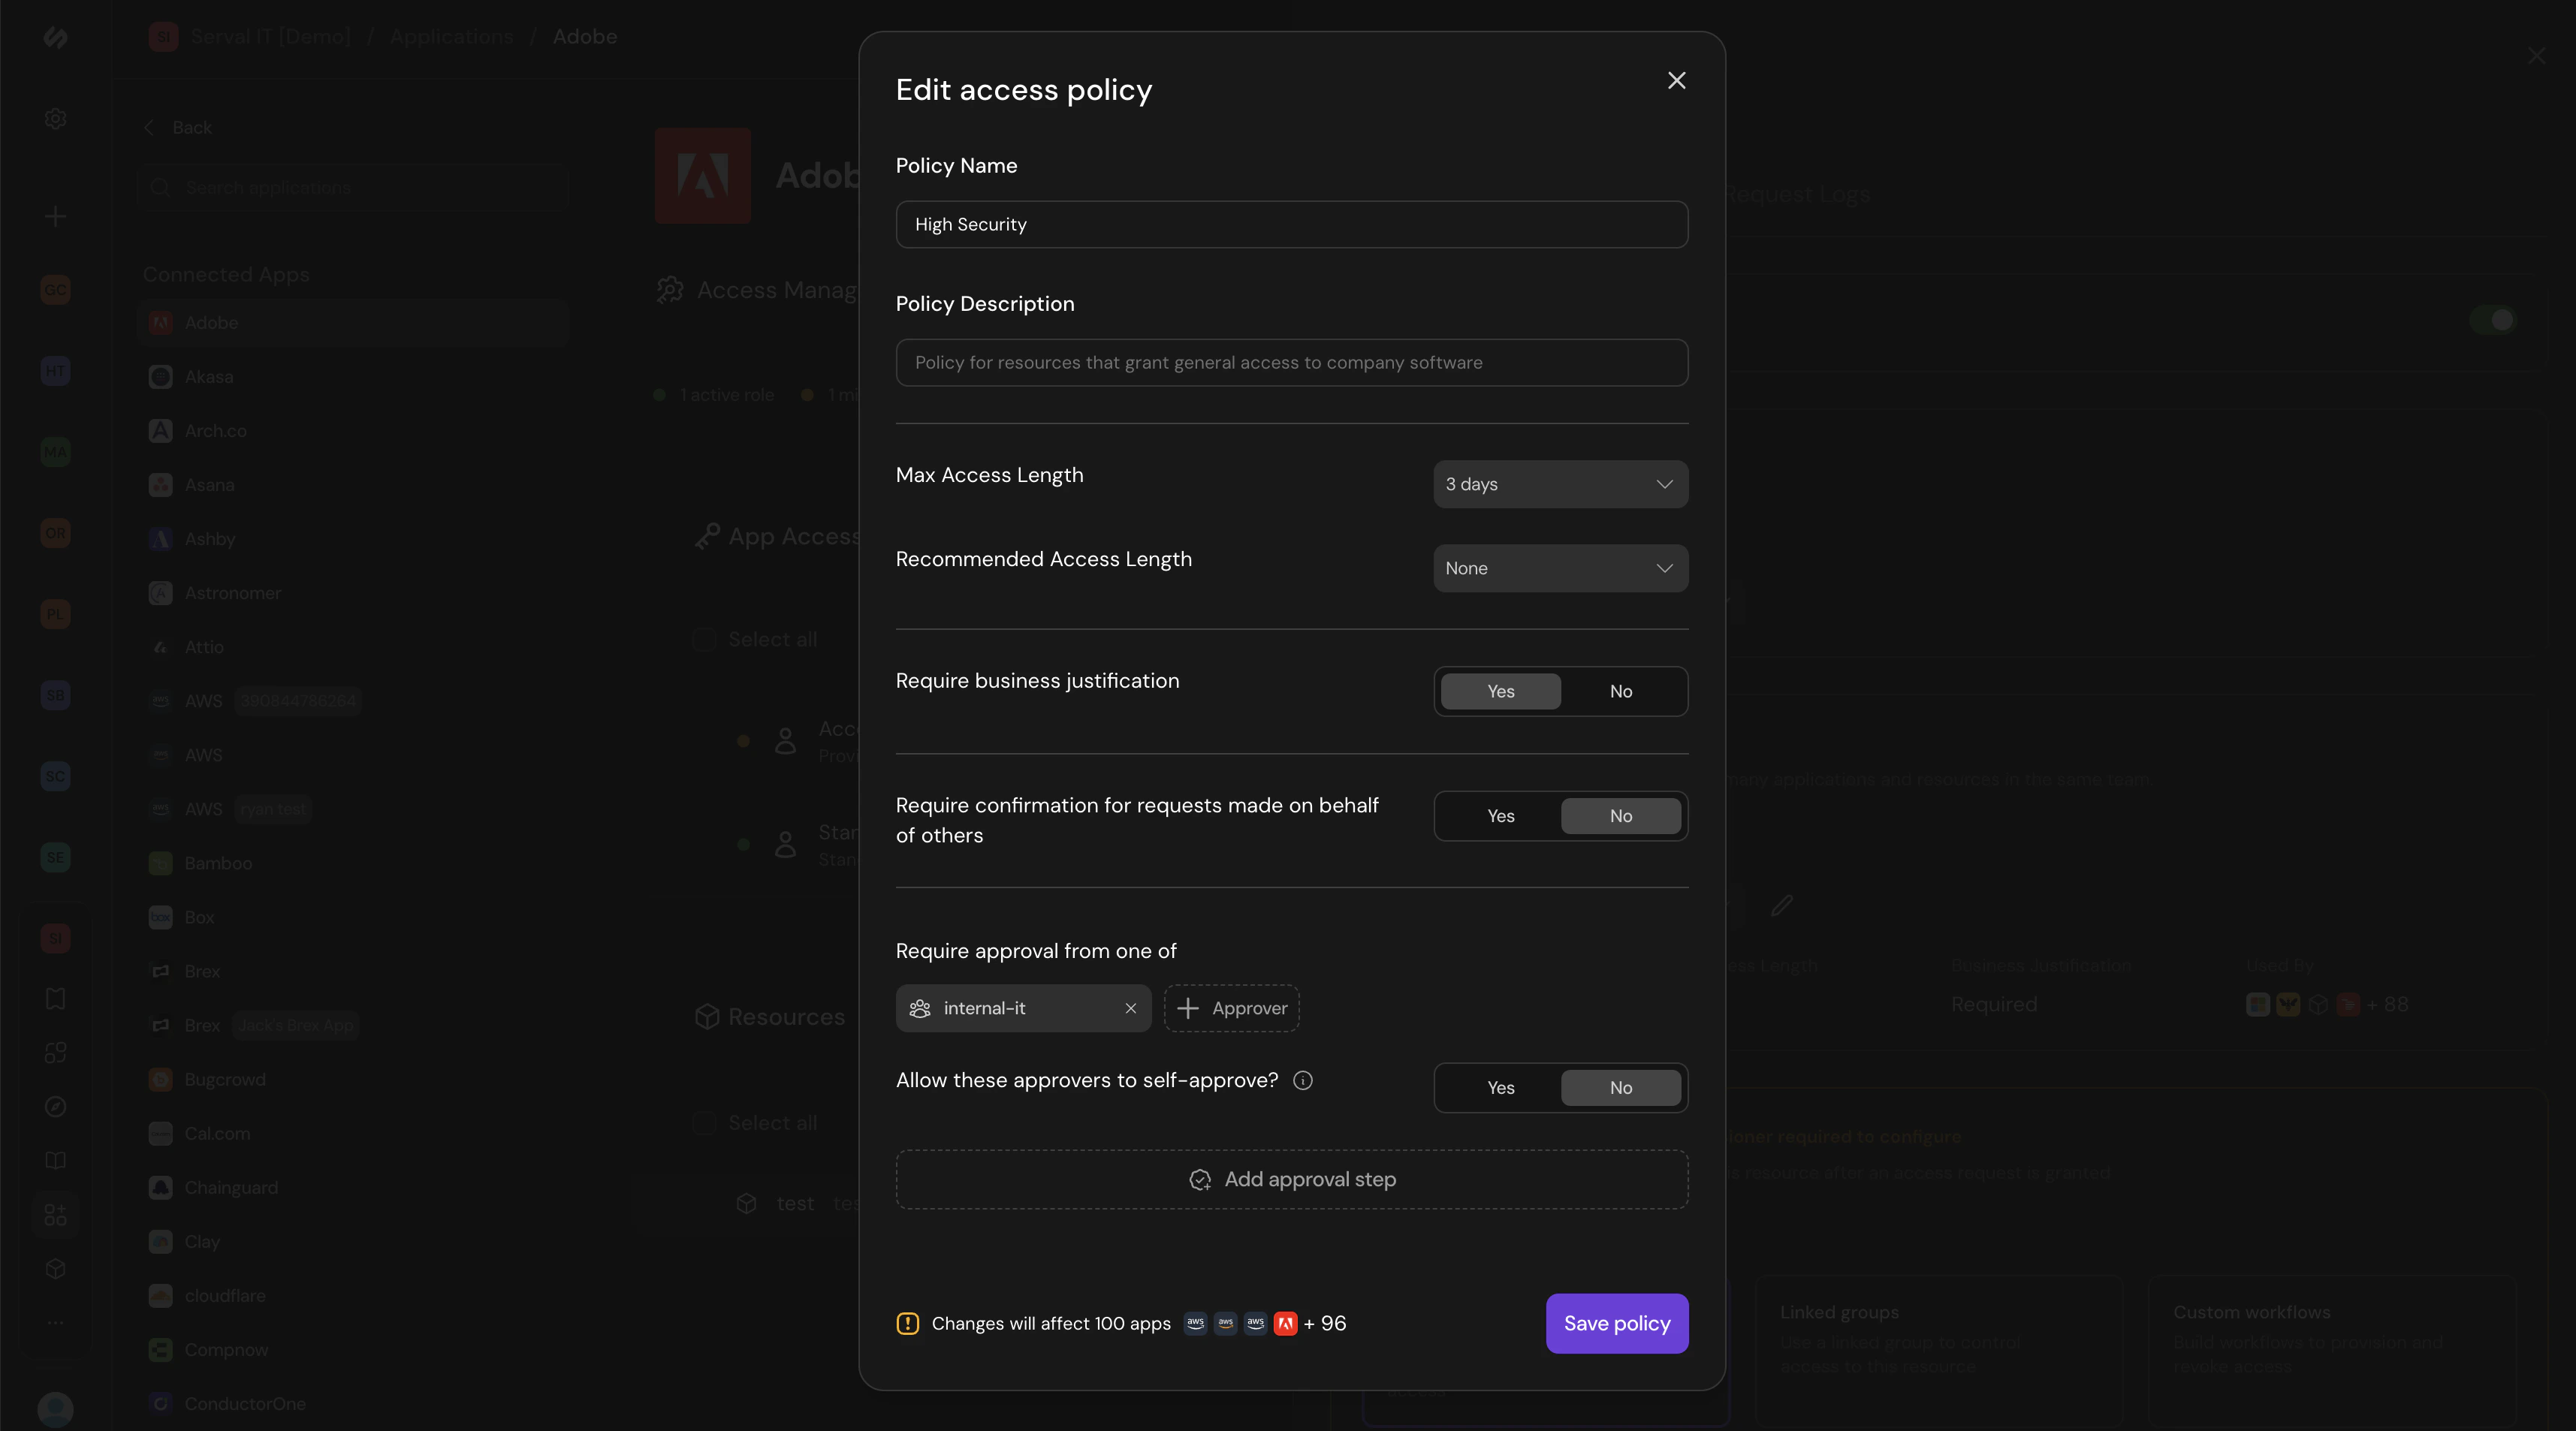
When creating or editing an access policy, configure the following settings to manage duration, and approvals needed for roles.Policy Name
Descriptive name that indicates when the policy should be used (e.g., “High Security”, “Standard Access”)
Policy Description
Detailed explanation of what the policy covers and when to apply it
Max Access Length
Maximum duration users can keep access before automatic revocation (options: indefinite, hours, days, weeks, months)
Recommended Access Length
Suggested duration to guide users toward shorter access periods while still allowing maximum if needed
Require Business Justification
Toggle on to require users to explain why they need access; Serval evaluates reasonableness based on guidance settings
Require Confirmation for Requests Made on Behalf of Others
Toggle on to add verification step when someone requests access for another user
Require Approval
Select specific users, groups, or special members (like user’s manager) who must approve requests
Allow Self-Approval
Toggle whether approvers can approve their own access requests
Multiple Approval Steps
Add sequential approval requirements where each step must be completed before the next begins
Impact Preview
View how many applications and roles will be affected by policy changes before saving
If you add multiple approvers in a single step, any one of them can approve the request. For sequential approvals, add multiple approval steps.
Create an Access Policy
Name the policy
Enter a policy name and description. Use descriptive names like “General Access” or “Temporary Admin Access” that indicate when the policy should be used.
Set access duration
Choose indefinite or time-limited access for Max Access Length. Optionally set a Recommended Access Length to guide users toward shorter access periods while still allowing them to request the maximum if needed.
Configure justification and confirmation
Toggle on “Require business justification” to require users to explain why they need access. Serval will evaluate whether the justification is reasonable based on your guidance settings.Toggle on “Require confirmation for requests made on behalf of others” to add verification when someone requests access for another user.
Set up approvals
Add approval steps by selecting approvers. You can require approval from specific users, groups, or special members like the user’s manager.For each approval step, configure:
- Who can approve (individual users or groups)
- Whether approvers can self-approve their own requests
- Whether any one approver can approve, or if all must approve
If you add multiple approvers in a single step, any one of them can approve the request. For sequential approvals, add multiple approval steps.
Manage Access Policies
Once created, access policies can be managed centrally and applied to multiple roles across your organization. To access policy management, navigate to the relevant team, click the ”…” button, and select “Access Policies.”Set a default policy
Set a default policy
Choose a default policy that applies to new roles automatically to ensure consistent baseline access controls.
Edit existing policies
Edit existing policies
Modify policy settings. Changes apply to all roles using that policy, making it easy to update access controls organization-wide.
View policy usage
View policy usage
See which roles currently use each policy to understand the impact before making changes.
Apply policies to roles
Apply policies to roles
Add or remove roles that the policy should apply to. Reuse policies across similar access patterns for consistency.
Add new policies
Add new policies
Set up new standard policies for your organization to be used across any number of roles.
Best Practices
Start strict, relax as needed
Begin with tighter controls and loosen them based on feedback. It’s easier to remove friction than add security later.
Use time limits for elevated access
Temporary access to admin or sensitive roles reduces security risk and ensures cleanup happens automatically.
Group similar roles under one policy
Create policies for access patterns, not individual roles. This makes management easier as you scale.
Review policies regularly
Audit which policies are in use and whether they still match your security requirements.
Extensions and Modifications
Users can request extensions or reductions to their active access. These modification requests follow the same approval workflow as initial requests:- Extensions require approval if configured in the access policy
- Approvers can modify durations when approving extension requests
- Users can amend requests before approval (the final requested duration is what the approver sees)
- No approval required? If no approval procedure is configured, requests and extensions auto-approve with the requested duration
If a user amends their request multiple times before approval, only the final amendment is submitted for approval. Earlier amendments are automatically superseded.