> ## Documentation Index
> Fetch the complete documentation index at: https://docs.serval.com/llms.txt
> Use this file to discover all available pages before exploring further.
# Build your first item type
> Define a schema, populate it, and query the result
This guide walks you through creating an item type, populating it with a few items, browsing the result, and connecting an ongoing data source. By the end, you'll have a working table you can query from anywhere in Serval.
## Create your first item
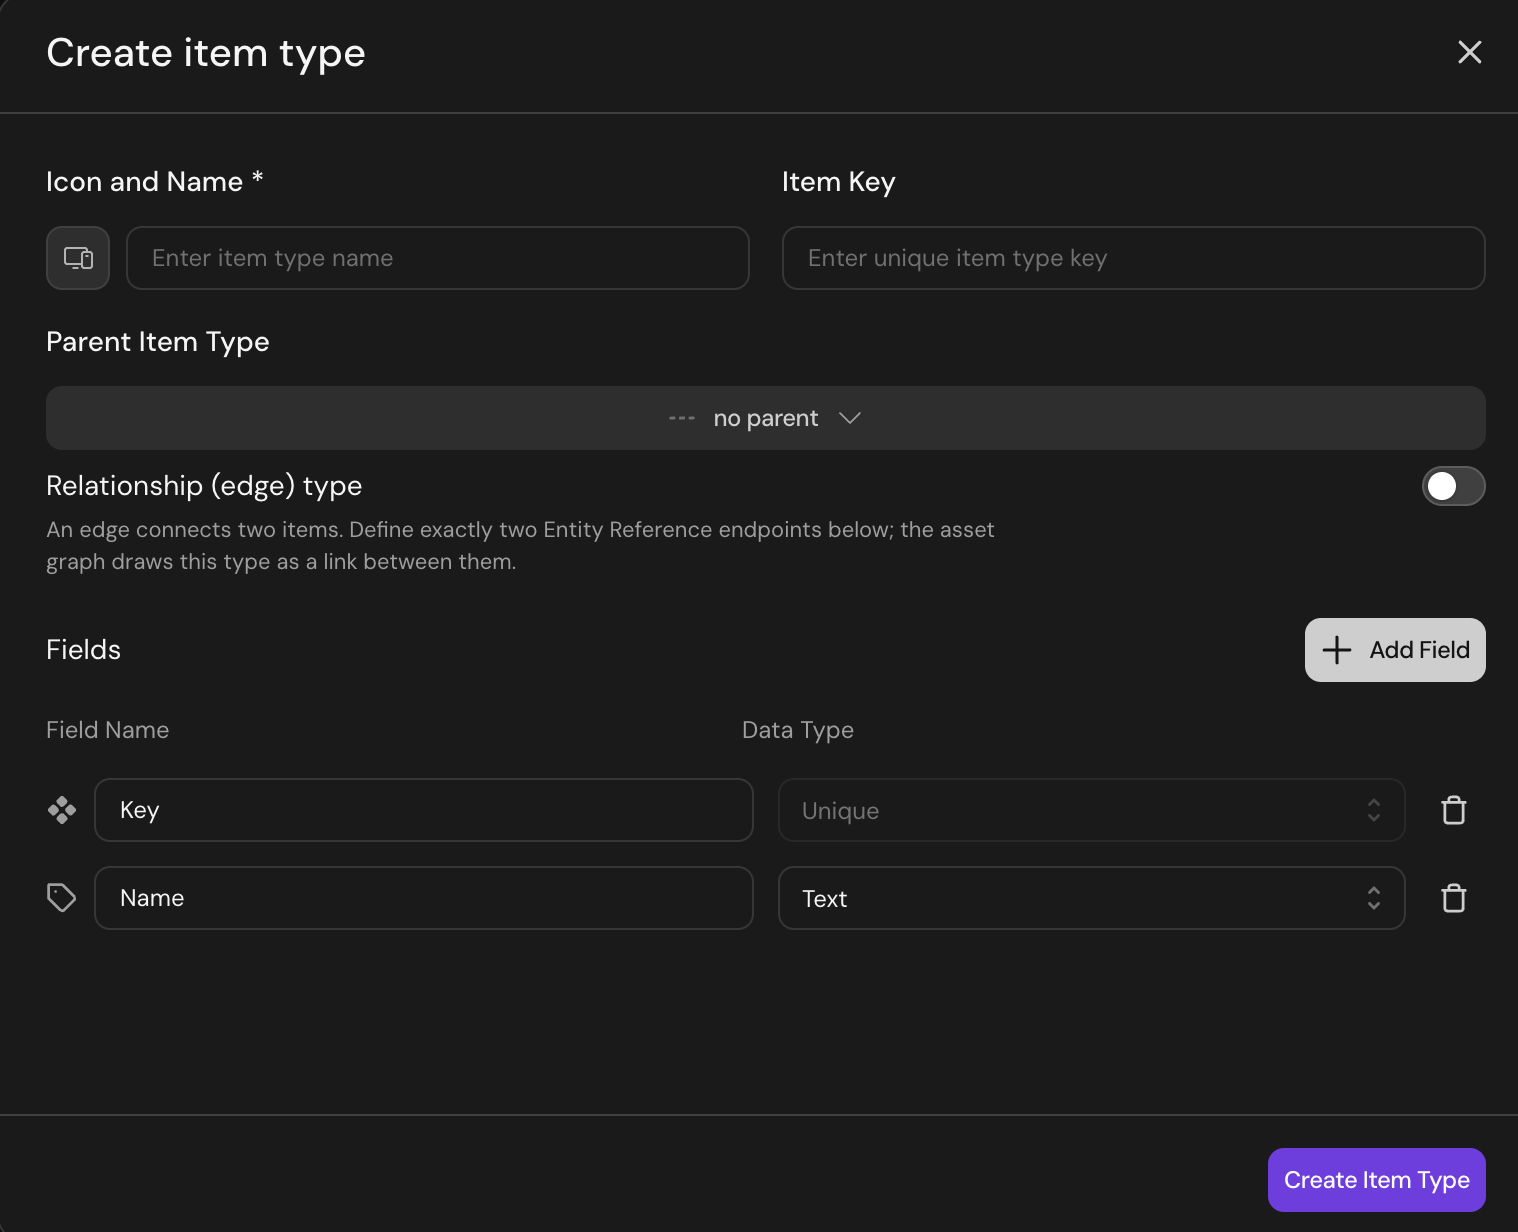 1. **Navigate to your team in the left panel and select Databases**
2. **Create the item type**
Click "New item type" in the top right. Name it after the thing you want to track. For this example, use "Computers." For this example, skip the optional field **Parent Item Type**.
3. **Add anchor fields**
Every item type needs two anchor fields:
* A unique **key field**, used for deduplication when syncing from external sources. For this example, use "Serial Number."
* A descriptive **name field**, used as the display label. For this example, use "Hostname."
4. **Add other fields**
Add typed fields for everything else you want to track. For this example, add these:
* "OS Version" (text)
* "Cost" (number)
* "Owner" (user reference)
* "Status" (enum: Active, In Repair, Retired)
5. **Add a few items by hand**
Click **New item** and fill in the fields for two or three computers. Hand entry is fine for a quick test. Once you're ready to sync from a real source, you will set up ingestion.
6. **Browse and filter**
Open the item type's list view. Filter on any field. Sort on any field. Save the view if you'll come back to it. Filters and saved views are private unless you share the view explicitly. Try filtering by "Status = Active" and sorting by "Cost" descending to see the most expensive active machines.
7. **Connect a source**
Once the schema is settled, replace manually-created items with a live ingestion. Click **Connect a source** on the item type. Pick an app you've already connected to Serval (your MDM, IdP, or procurement tool), choose an installable extraction workflow or write one in natural language, and accept the AI-suggested field mappings. Serval handles the first sync and keeps the item type fresh on the schedule you set.
For more information on ingestion (including full setup, multi-source reconciliation, and troubleshooting), see [Ingestion](/sections/documentation/databases/ingestion).
## Tips for building an item type
### Pick a stable key
Choose a key field that's unique and unchanging. Serial numbers, asset tags, and email addresses make better keys than display names.
### Type narrowly
Use enums for fixed sets and user references for ownership. Use text fields as a fallback, not a default.
### Settle the schema before ingesting
Changing field types after ingestion is supported but triggers a schema migration. Take time to think through your schema before you begin ingestion.
## What's next
Model relationships, evolve fields safely, and use reference-data schemas for lookup tables.
Feed one item type from multiple apps and pick the source of truth per field.
Read and write items from workflow code. Surface item data to the Help Desk Agent.
1. **Navigate to your team in the left panel and select Databases**
2. **Create the item type**
Click "New item type" in the top right. Name it after the thing you want to track. For this example, use "Computers." For this example, skip the optional field **Parent Item Type**.
3. **Add anchor fields**
Every item type needs two anchor fields:
* A unique **key field**, used for deduplication when syncing from external sources. For this example, use "Serial Number."
* A descriptive **name field**, used as the display label. For this example, use "Hostname."
4. **Add other fields**
Add typed fields for everything else you want to track. For this example, add these:
* "OS Version" (text)
* "Cost" (number)
* "Owner" (user reference)
* "Status" (enum: Active, In Repair, Retired)
5. **Add a few items by hand**
Click **New item** and fill in the fields for two or three computers. Hand entry is fine for a quick test. Once you're ready to sync from a real source, you will set up ingestion.
6. **Browse and filter**
Open the item type's list view. Filter on any field. Sort on any field. Save the view if you'll come back to it. Filters and saved views are private unless you share the view explicitly. Try filtering by "Status = Active" and sorting by "Cost" descending to see the most expensive active machines.
7. **Connect a source**
Once the schema is settled, replace manually-created items with a live ingestion. Click **Connect a source** on the item type. Pick an app you've already connected to Serval (your MDM, IdP, or procurement tool), choose an installable extraction workflow or write one in natural language, and accept the AI-suggested field mappings. Serval handles the first sync and keeps the item type fresh on the schedule you set.
For more information on ingestion (including full setup, multi-source reconciliation, and troubleshooting), see [Ingestion](/sections/documentation/databases/ingestion).
## Tips for building an item type
### Pick a stable key
Choose a key field that's unique and unchanging. Serial numbers, asset tags, and email addresses make better keys than display names.
### Type narrowly
Use enums for fixed sets and user references for ownership. Use text fields as a fallback, not a default.
### Settle the schema before ingesting
Changing field types after ingestion is supported but triggers a schema migration. Take time to think through your schema before you begin ingestion.
## What's next
Model relationships, evolve fields safely, and use reference-data schemas for lookup tables.
Feed one item type from multiple apps and pick the source of truth per field.
Read and write items from workflow code. Surface item data to the Help Desk Agent.